Do you want to embark on the adventure of a 12V solar panel to power your van, your garden shed or even a small isolated system? It’s a great idea to gain autonomy, but be careful, you shouldn’t rush into it blindly. Properly sizing your installation is key to avoiding unpleasant surprises, such as a battery that dies too quickly or a lack of energy when you need it most. In this article, we’ll see together how to do this well, step by step, so that your 12V solar panel system works perfectly.
Key Points to Remember
- Understanding your energy needs is the starting point for accurate sizing of your 12V solar panel.
- The choice of charge controller (PWM or MPPT) and battery is as important as the panel itself for the lifespan of your installation.
- The location and orientation of the 12V solar panel directly influence its energy production, so take the time to think carefully about it.
- Regular maintenance of your 12V solar panel system ensures its performance and helps identify problems before they become significant.
- Avoiding under-sizing or over-sizing is essential to avoid wasting money and guarantee the reliability of your 12V solar panel installation.
Understanding the fundamentals of a 12V solar panel
Operating principles and advantages
A 12V solar panel is a bit like a small personal power plant. It captures sunlight and converts it into electricity, which you can then use to power various devices. The principle is simple: photovoltaic cells, made of semiconductor materials, absorb photons (light particles) and create an electric current. This current is then collected and routed to a circuit. The main advantage is energy autonomy, especially if you are far from the traditional electricity grid.
- Ecological: No polluting emissions during operation.
- Economical: Reduced electricity bill in the long term.
- Silent: Noise-free operation.
Solar energy is an inexhaustible resource. Using a 12V solar panel is a gesture for the planet while gaining energy independence.
Types of 12V solar panels available
There are several types of 12V solar panels, each with its own characteristics and advantages. The most common are monocrystalline, polycrystalline and amorphous panels. Monocrystalline panels are known for their high efficiency and long lifespan, but they are generally more expensive. Polycrystalline panels are a more affordable alternative, with slightly lower efficiency. Amorphous panels, on the other hand, are flexible and lightweight, but their efficiency is the lowest. The choice will depend on your budget, available space and energy needs. It is important to understand how a solar panel works to make the right choice.
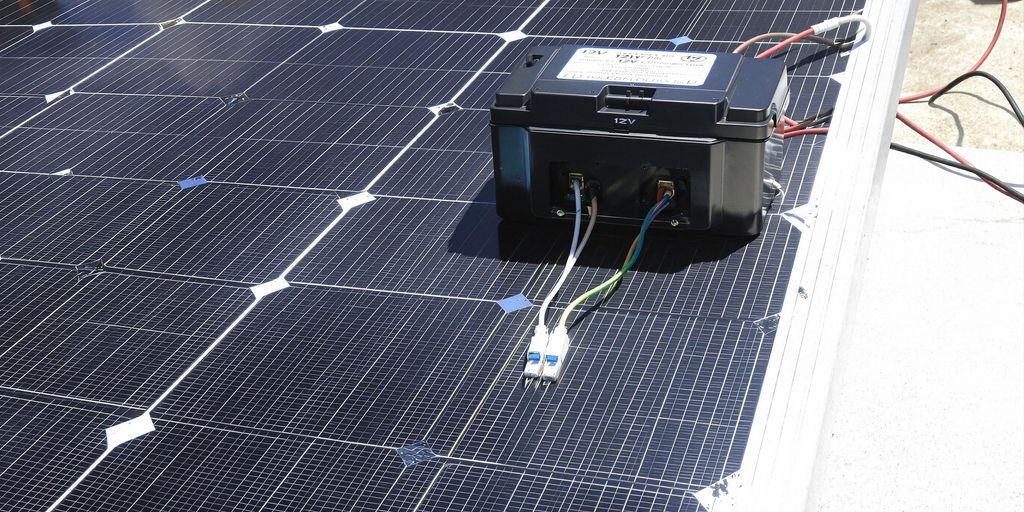
Essential components of a 12V installation
A 12V solar installation is not limited to the solar panel itself. Several other components are essential to ensure optimal and safe operation. Here are the main ones:
- The charge controller: It protects the battery against overcharging and deep discharge, thus extending its lifespan.
- The battery: It stores the energy produced by the solar panel for later use, when the sun is not shining.
- Cables and connectors: They ensure the connection between the different components and must be correctly sized to avoid energy losses.
In addition to these elements, an inverter may be necessary if you want to power devices operating at 220V. It converts 12V DC current into 220V AC current. A well-designed installation guarantees a reliable and durable power supply. It is important to note that the correct sizing of each component is crucial for the overall performance of the system. For example, choosing a qualified air conditioning installer is essential to avoid costly mistakes.
Accurate assessment of energy needs for your 12V solar panel
To correctly size your 12V solar panel, it is essential to accurately assess your energy needs. Underestimation can lead to rapid degradation of your system, while overestimation can lead to unnecessary costs. This step is therefore crucial to guarantee the efficiency and durability of your installation.
Methodology for calculating daily consumption
The first step is to make a complete inventory of all electrical appliances you intend to power with your 12V solar panel. For each appliance, note its power in watts and the number of hours of daily use. Multiply these two values to obtain the daily energy consumption in watt-hours (Wh). Then add up the consumption of all appliances to obtain your total daily consumption. Don’t forget to include losses due to the inverter if you are using 220V appliances.
Here is an example table to help you organise your calculations:
| Appliance | Power (W) | Hours of use/day | Consumption (Wh/day) |
|---|---|---|---|
| LED Lamp | 5 | 4 | 20 |
| Television | 50 | 2 | 100 |
| Laptop | 60 | 3 | 180 |
| Phone charger | 10 | 1 | 10 |
| Total | 310 |
Identification of compatible 12V electrical appliances
It is important to distinguish between appliances that operate directly on 12V and those that require an inverter to be powered. 12V appliances, such as LED lamps, water pumps or some phone chargers, are more efficient because they avoid inverter conversion losses. Prioritise 12V appliances as much as possible to optimise the efficiency of your installation. If you need to use 220V appliances, choose a quality inverter with good efficiency. For a successful installation, it is important to choose a qualified air conditioning installer.
Anticipation of seasonal consumption variations
Your energy needs can vary considerably depending on the season. In winter, for example, you will probably need more lighting and heating, while in summer, you will use more ventilation or air conditioning. It is therefore crucial to anticipate these variations and size your 12V solar panel according to the time of year when your consumption is highest. For a more precise estimate, you can consult our page on sizing a photovoltaic installation.
It is recommended not to underestimate your energy needs. It is better to provide a safety margin to avoid excessively discharging your battery, which could reduce its lifespan. Also think about the evolution of your future needs, for example if you plan to add new electrical appliances to your installation.
To optimise HVAC energy performance, it is important to take into account RE2020 requirements.
Sizing the 12V solar panel and charge controller
The adequate sizing of your 12V solar panel and charge controller is a decisive step to guarantee the efficiency and longevity of your installation. Precise calculation makes it possible to avoid under-sizing, which limits energy production, or over-sizing, which generates unnecessary costs. It is therefore essential to follow a rigorous methodology to determine the necessary power and choose the appropriate components.
Calculating the required power of the 12V solar panel
To calculate the necessary power of your 12V solar panel, you must first assess your daily energy consumption. Add up the consumption in watts of all the appliances you intend to power with your solar installation. Then multiply this total by the number of hours of daily use of each appliance. The sum of these results will give you your total energy consumption in watt-hours (Wh) per day.
Then, divide this consumption by the voltage of your system (12V) to obtain the necessary current in ampere-hours (Ah). To compensate for losses due to system inefficiency and variable weather conditions, it is recommended to increase this result by a safety factor of 20 to 30%. Finally, divide the increased current by the average number of hours of sunshine per day in your region to determine the current that your solar panel must supply. Multiply this current by the panel voltage (generally around 17-18V for a 12V panel) to obtain the required power in watts.
Choosing the right charge controller (PWM or MPPT)
The charge controller is an essential component that protects your battery against overcharging and deep discharge. There are two main types of charge controllers: PWM (Pulse Width Modulation) and MPPT (Maximum Power Point Tracking). PWM controllers are more economical and suitable for small installations where the solar panel voltage is close to that of the battery. They work by directly connecting the panel to the battery, modulating the pulse width to control the charging current.
MPPT controllers, on the other hand, are more sophisticated and efficient, especially when the solar panel voltage is significantly higher than that of the battery. They use an algorithm to find the maximum power point of the panel and optimise energy transfer to the battery. An MPPT controller can increase the efficiency of your installation by 10 to 30%, which is particularly interesting in less sunny regions or for larger installations. The choice between PWM and MPPT therefore depends on your budget, the size of your installation and the sunshine conditions in your region. It is important to note that the choice of controller must be adapted to the battery composition, whether it is gel, lithium or lead-acid.
Importance of the panel’s open circuit voltage
The open circuit voltage (Voc) of the solar panel is the maximum voltage the panel can produce when not connected to a load. It is crucial to ensure that the Voc of the solar panel does not exceed the maximum voltage allowed by the charge controller. Exceeding this limit can damage the controller and compromise the operation of your installation. The nominal voltage of the solar panel must be at least the same as the battery voltage, ideally 10% to 20% higher. For example, to recharge a 12V 200ah battery, a solar panel with a nominal voltage between 12V and 14V will be ideal. It is also important to choose cables suitable for the current intensity to avoid energy losses and overheating risks.
Selection and sizing of the battery for your 12V solar panel
Choosing the right battery for your 12V solar installation is a crucial step. An incorrectly sized battery can reduce the efficiency of your system and even lead to costly damage. It is therefore important to understand the different aspects to consider to make the best choice.
Determining the necessary storage capacity
The necessary storage capacity depends directly on your daily energy needs and the level of autonomy you wish to achieve. To determine this capacity, you must evaluate the total consumption of all the appliances you will power with your solar system.
Here are some steps to follow:
- List all appliances that will be powered by the battery.
- Determine the power consumption in Watts of each appliance.
- Estimate the daily usage time of each appliance.
- Calculate the total daily consumption in Watt-hours (Wh).
Once you have the total daily consumption in Wh, you can calculate the required battery capacity taking into account the system voltage (12V) and the maximum recommended depth of discharge for the type of battery you choose. Don’t forget to consider energy losses in the system. For a more precise estimate, you can consult our page on sizing a photovoltaic installation.
Comparison of 12V battery technologies (gel, lithium, lead-acid)
There are several 12V battery technologies available on the market, each with its own advantages and disadvantages. The main technologies are:
- Lead-acid batteries: These are the most economical batteries, but they have a shorter lifespan and require regular maintenance. They are sensitive to deep discharges.
- Gel batteries: They are more expensive than lead-acid batteries, but they require no maintenance and are more resistant to deep discharges. They have a longer lifespan.
- Lithium batteries: These are the most expensive batteries, but they offer the best performance in terms of lifespan, weight and depth of discharge. They are also safer and require no maintenance. To determine the number of batteries needed, you need to estimate your energy needs, define your desired level of autonomy and take into account energy losses. Number of batteries is an important factor.
It is important to choose a battery adapted to your needs and your budget. Lithium batteries are an excellent choice if you are looking for performance and durability, but they are more expensive. Lead-acid batteries are a more economical option, but they require regular maintenance and have a shorter lifespan.
Optimising battery lifespan
To optimise the lifespan of your battery, it is important to follow the manufacturer’s recommendations for charging and discharging. Here are some tips:
- Do not discharge the battery below the maximum recommended depth of discharge.
- Use a charge controller adapted to the type of battery to avoid overcharging.
- Keep the battery in a cool, dry place.
- Perform regular maintenance of the battery, if necessary (for example, check the electrolyte level for lead-acid batteries).
It is strongly recommended to use a charge controller adapted to the battery’s composition, whether it is a gel, lithium or lead-acid battery. Without this, you risk overcharging and damaging your battery, significantly reducing its lifespan. The choice of battery depends on the solar panel voltage and the total power of the installation. Battery selection is therefore crucial.
Physical installation and connection of the 12V solar panel
The physical installation and connection of a 12V solar panel are crucial steps to guarantee the performance and durability of your installation. Rigorous planning and careful execution are essential to avoid subsequent problems. We certainly don’t want to end up with a defective solar panel after a few months!
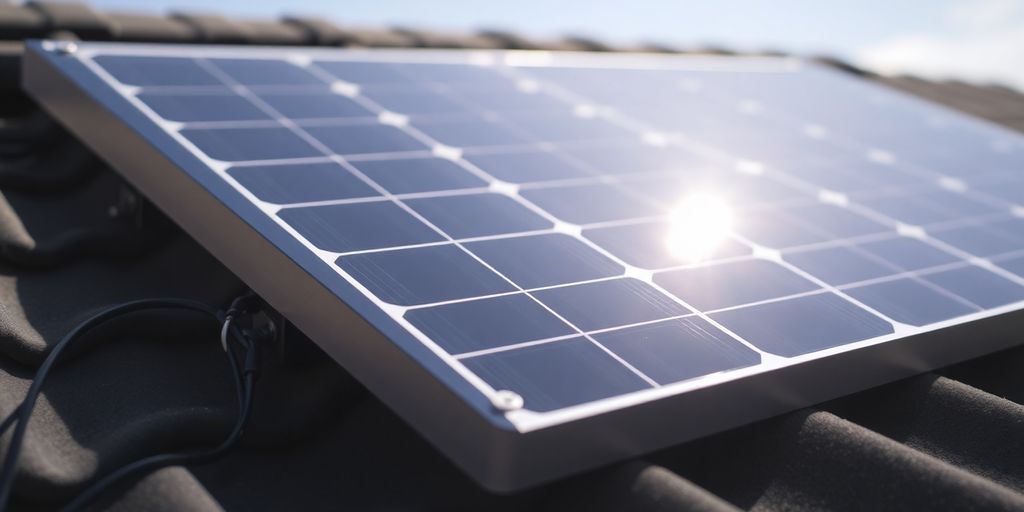
Criteria for choosing the optimal location
The choice of location is paramount. Several factors must be taken into account to maximise the energy production of your solar panel:
- Sun exposure: The location must benefit from maximum sun exposure throughout the day, especially during the sunniest hours.
- Absence of shade: Avoid areas where trees, buildings or other obstacles could cast shade on the solar panel.
- Orientation: In the northern hemisphere, a south-facing orientation is generally optimal. The ideal inclination depends on your latitude and the season.
It is highly recommended to carry out a sun exposure study to determine the most appropriate location. Online tools or professionals can help you assess the sun exposure of your site.
Techniques for fixing and orienting the 12V solar panel
There are different fixing techniques, adapted to different types of supports (roof, ground, wall…). The choice will depend on your specific situation and the type of solar panel. Make sure the fixing is solid and weather-resistant. For installation on a motorhome roof, there are suitable solar kits.
- Roof mounts: These mounts allow the solar panel to be fixed directly to the roof, respecting the optimal inclination.
- Ground mounts: These mounts are ideal for ground installations, offering great flexibility of orientation.
- Wall mounts: These mounts allow the solar panel to be fixed to a wall, adjusting the inclination if necessary.
Secure wiring and connection procedures
Wiring and connection must be carried out carefully to avoid short circuits and energy losses. Use appropriately sized cables and quality connectors. Here are the steps to follow:
- Cut off the power: Before starting, make sure the solar panel and battery are disconnected.
- Connect the solar panel to the charge controller: Use appropriately sized cables and observe polarity (positive and negative).
- Connect the charge controller to the battery: Also use appropriately sized cables and observe polarity.
- Check the connections: Make sure all connections are tight and insulated. A heat pump installation is similar, the connections must be checked carefully.
It is advisable to call on a qualified professional if you are unsure of your electrical wiring skills.
Optimising the performance of your 12V solar panel installation
To get the most out of your 12V solar installation, it is essential to optimise every aspect, from location to energy management. A methodical approach will allow you to maximise efficiency and extend the lifespan of your system. I’ve seen so many people overlook important details and end up wasting money. Don’t make the same mistake!
Impact of tilt and orientation on production
The tilt and orientation of your solar panels have a direct impact on the amount of energy they can capture. The optimal angle varies depending on your latitude and the seasons. In general, a tilt equal to your latitude is ideal for maximum annual production. For winter, increase the tilt by 15 degrees, and for summer, decrease it by 15 degrees. A south-facing orientation is generally the best, but slight adjustments may be necessary depending on surrounding obstacles. It is important to choose the ideal location for your installation.
Strategies to maximise energy efficiency
Several strategies can be implemented to maximise the energy efficiency of your 12V solar installation:
- Use an MPPT (Maximum Power Point Tracking) charge controller to optimise the voltage and charging current of the battery.
- Keep solar panels clean to avoid efficiency loss due to dust and debris.
- Regularly check connections and wiring to ensure there are no power losses.
- Use high-efficiency batteries and maintain them properly to maximise their lifespan.
A well-sized and optimised solar installation can offer you significant energy autonomy and reduce your dependence on the electricity grid. However, it is important to regularly monitor the performance of your system and make necessary adjustments to maintain optimal efficiency.
Managing shading and environmental factors
Shading, even partial, can significantly reduce the energy production of your solar panels. It is therefore crucial to choose a location free of shading during peak sunlight hours. Trees, buildings and other obstacles can cast shadows on your panels, reducing their efficiency. Environmental factors such as temperature and humidity can also affect panel performance. Good ventilation can help keep panels at an optimal temperature, while a protective coating can protect them from moisture and corrosion. It is important to improve the energy efficiency of your installation.
Here is a table illustrating the impact of shading on energy production:
| Shading level | Reduction in energy production |
|---|---|
| None | 0% |
| Partial (25%) | 30-50% |
| Significant (50%) | 60-80% |
| Total | 100% |
In conclusion, optimising the performance of your 12V solar installation requires particular attention to tilt, orientation, shading management and environmental factors. By implementing appropriate strategies, you can maximise energy efficiency and fully enjoy the benefits of solar energy. Don’t forget to properly size your solar system for optimal performance.
Maintenance and monitoring of your 12V solar panel system
Regular maintenance procedures for components
Regular maintenance of your 12V solar installation is essential to guarantee its performance and durability. This includes cleaning the solar panels, checking electrical connections and inspecting the battery. Dust, leaves and other debris can reduce the efficiency of the panels. Regular cleaning with clear water is therefore recommended. It is also important to regularly check the condition of the cables and connectors to ensure there is no corrosion or damage.
- Clean solar panels at least twice a year, or more often in dusty areas.
- Check electrical connections every six months.
- Inspect the battery for any signs of corrosion or swelling.
Monitoring production and battery status
It is important to regularly monitor the energy production of your 12V solar panel and the status of your battery. This will allow you to quickly detect any problems and take the necessary corrective measures. A guide to autonomous solar can help you understand and troubleshoot your installation. You can use a multimeter to check the battery voltage. If a multimeter reads 12.2V, the battery is 50% discharged. Disconnect the power and recharge it to avoid damage.
Regular monitoring of your system will allow you to optimise its performance and extend its lifespan.
Identification and resolution of common problems
Several problems can affect the operation of your 12V solar installation. It is important to know how to identify them and what possible solutions exist. A common problem is a drop in energy production, which can be due to panel fouling, shading or a wiring problem. A battery that does not charge correctly may be due to a faulty charge controller or a battery at the end of its life. It is crucial to properly size your solar system to avoid problems of under-sizing or over-sizing.
- Check for shading on the solar panels.
- Ensure the charge controller is working correctly.
- Test the battery to check its capacity and condition.
Regular maintenance and careful monitoring are essential to ensure the performance and durability of your 12V solar panel installation. It is also important to consult a professional in case of complex or persistent problems. Don’t forget to check the electrical safety standards for a compliant and durable installation.
Budgetary considerations and profitability of a 12V solar panel
Adopting a 12V solar panel system represents an initial investment that deserves in-depth analysis in terms of costs and long-term benefits. It is essential to evaluate all financial aspects to ensure that the installation is not only viable, but also profitable.
Estimation of acquisition and installation costs
The initial cost of a 12V solar panel system can vary considerably depending on several factors. These factors include panel power, component quality (charge controller, battery, cables), and installation costs. A photovoltaic panel can cost between 150 and 1000 euros. It is therefore crucial to obtain detailed quotes from different suppliers and installers to compare prices and services offered.
Here are some elements to consider when estimating costs:
- Solar panel: The price varies depending on the power, cell type (monocrystalline, polycrystalline), and brand.
- Charge controller: Essential to protect the battery against overcharging and deep discharge. MPPT models are more expensive but more efficient than PWM.
- Battery: The cost depends on the storage capacity, technology (gel, lithium, lead-acid), and lifespan.
- Cables and connectors: Quality components are essential to ensure a reliable and durable connection.
- Mounting structure: The cost varies depending on the type of support (roof, ground, mobile) and the materials used.
- Installation: Installation costs can vary depending on the complexity of the project and labour.
Analysis of long-term return on investment
The return on investment (ROI) of a 12V solar panel system depends on several factors, including initial cost, energy production, and electricity price. It is important to calculate the time needed to recover the initial investment through energy savings.
To calculate the ROI, you can use the following formula:
ROI = (Annual savings x System lifespan) - Initial cost
It is important to note that ROI can be influenced by variations in electricity prices, tax incentives, and government subsidies. For example, in Belgium, a solar installation can generate significant annual savings, allowing the investment to be recouped in a few years.
It is crucial to take into account the lifespan of components, especially the battery, which may require replacement after a few years. Regular maintenance and proper use can extend battery life and improve ROI.
Potential for energy savings and autonomy
One of the main advantages of a 12V solar panel system is the potential for energy savings and autonomy. By producing your own electricity, you can reduce your dependence on the electricity grid and lower your energy bills. In addition, a 12V solar system can provide you with a reliable source of energy in the event of a power outage.
The energy savings achieved through a 12V solar system can be used to finance other projects or to improve your quality of life. In addition, the energy autonomy offered by a 12V solar system can be particularly interesting for off-grid applications, such as motorhomes, boats, and isolated sites. It is important to note that producing your own electricity avoids paying network fees and VAT on self-consumed electricity.
Regulations and standards applicable to 12V solar panel installations
The installation of 12V solar panels, although often perceived as simple, is subject to a set of regulations and standards that must be known and respected. These rules aim to guarantee the safety of installations, their compliance with environmental requirements and their durability. Ignoring these aspects can lead to administrative sanctions, safety problems and reduced system performance.
Legal and administrative requirements
Before proceeding with the installation of solar panels, it is crucial to find out about the legal and administrative requirements in force. In France, this generally involves obtaining authorisation from your town hall, especially if your home is already built. The procedures may vary depending on the power of the installation and its integration into the building. A prior declaration of works is often necessary, and in some cases, a building permit may be required. It is therefore advisable to contact your local planning department to find out what formalities need to be completed.
Electrical safety and compliance standards
Electrical safety is a primary aspect when installing solar panels. Installations must comply with standard NF C 15-100, which governs low-voltage electrical installations. This standard defines the rules for the design, construction and verification of electrical installations to ensure the safety of people and property. It is also important to ensure that the components used, such as cables, connectors and protective devices, comply with current European standards. Ademe specifies a limit of 900 VA per circuit for solar panels.
Tips for a compliant and durable installation
To ensure a compliant and durable installation, it is recommended to follow these tips:
- Call on a qualified and certified installer, who has the necessary skills and experience to carry out an installation that complies with safety standards.
- Use quality components, certified and compliant with European standards.
- Respect wiring and connection rules, using appropriately sized cables and ensuring good insulation of connections.
- Install appropriate protection devices, such as circuit breakers, fuses and surge protectors, to protect the installation against overvoltages and short circuits.
- Have the installation checked by an approved body before commissioning, to ensure its compliance with safety standards.
Compliance with regulations and standards is essential to guarantee the safety, performance and durability of a 12V solar panel installation. A compliant installation makes it possible to avoid safety problems, administrative sanctions and performance losses, while contributing to the energy transition and environmental protection.
By following these recommendations and staying informed of regulatory developments, you will be able to fully enjoy the benefits of solar energy safely and legally. Don’t forget that the solar kit is an excellent way to charge an auxiliary battery.
Avoiding common mistakes when sizing a 12V solar panel
It is crucial to avoid sizing errors when installing a 12V solar panel to ensure optimal performance and increased durability of your system. Incorrect sizing can lead to problems such as insufficient power, premature battery wear, or wasted money. Here are some common mistakes to avoid:
Consequences of under-sizing or over-sizing
Under-sizing your solar installation can lead to insufficient power supply, especially during periods of low sunshine. This can result in batteries discharging too quickly, reducing their lifespan and leaving you without power when you need it most. Conversely, over-sizing represents an unnecessary investment. It is therefore essential to properly assess your energy needs.
Importance of prior thermal study
A prior thermal study is essential to accurately assess your energy needs. This study takes into account seasonal variations, the insulation of your home, and local climatic conditions. Without this study, it is difficult to correctly size your solar installation. For a more precise evaluation, you can consult a guide on sizing a photovoltaic installation.
Precautions for a reliable and efficient installation
To ensure a reliable and efficient installation, it is important to take certain precautions:
- Check the polarity of the cables before connecting the solar panel cables.
- Choose a charge controller suitable for your battery type.
- Make sure all components are compatible with each other.
- Protect your installation against overvoltages and short circuits.
A well-sized system minimises the risk of overload and failure, thus increasing the overall safety of the installation. Good planning also includes safety margins to cope with unforeseen situations, such as a temporary increase in electricity consumption.
It is also important to avoid common electrical errors, such as using an unsuitable AGM charger or the absence of a DC/DC booster.
To avoid problems when choosing the size of your 12V solar panel, there are pitfalls to avoid. Learn how to do it right by visiting our website!
In summary: properly sizing your 12V solar installation
Finally, properly sizing your 12V solar installation is really important. It ensures you have enough energy for what you need, without spending too much money. Take the time to calculate your needs carefully, and choose the right panels and battery. If you do that, your solar system will work well for a long time. It’s a good way to save money and enjoy the sun’s energy.
Frequently Asked Questions
What is a 12V solar panel and what is it used for?
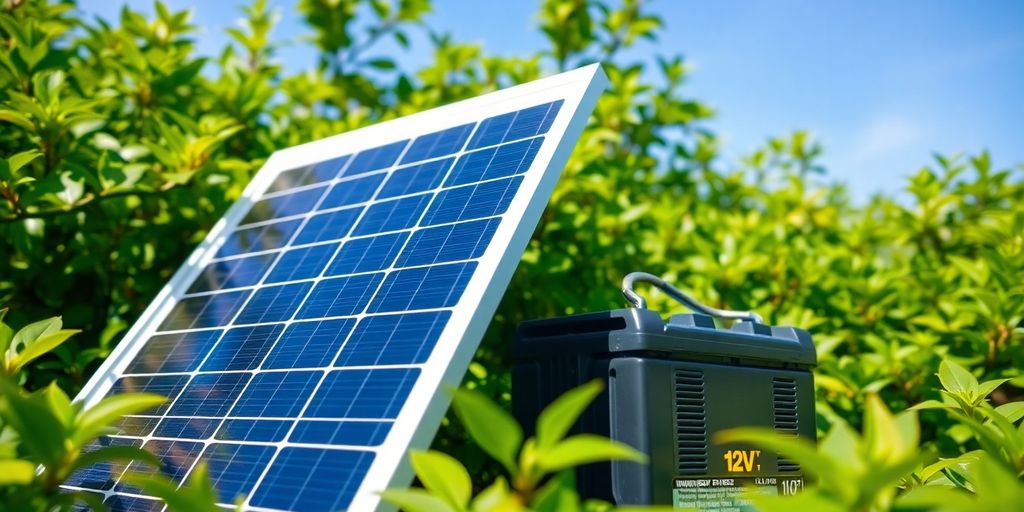
A 12V solar panel is a device that converts sunlight into electricity, specifically designed for systems that operate with a voltage of 12 volts. It’s perfect for small energy needs, such as in a motorhome, a boat, or to power isolated devices.
How to avoid mistakes when choosing the size of your 12V solar panel?
To avoid mistakes, you must first calculate how much energy you use each day. Then, choose a panel powerful enough to produce that energy, even on less sunny days. Don’t choose a panel that’s too small, otherwise you’ll run out of energy, nor too big, which would be unnecessarily expensive.
Why is the charge controller so important in a 12V installation?
The charge controller is super important. It protects your battery by managing the amount of electricity that goes into it. Without it, the battery could overcharge or undercharge, which would damage it quickly. There are two main types: PWM (simpler) and MPPT (more efficient).
How do I know what size battery I need for my 12V solar panel?
To know which battery to choose, you must first estimate your daily electricity consumption. Once you have this figure, you can calculate the battery size needed to store enough energy for your needs, taking into account days without sun.
Where should I install my 12V solar panel for best performance?
The ideal place is a sunny spot all day, without shade. The panel must be well oriented (often south-facing) and tilted to capture maximum sunlight. Good fixing is also essential to prevent it from moving.
How can I ensure my 12V solar installation remains efficient for a long time?
To keep your installation working at its best, regularly clean the panel to remove dust and dirt. Check the cables and connections to ensure they are always in good condition. Also monitor the condition of your battery so that it lasts longer.
Are there any rules or laws to follow when installing a 12V solar panel?
Yes, there are rules to follow, especially if your installation is connected to the house’s electrical grid. Even for small autonomous installations, electrical safety standards must be respected to avoid accidents. Inquire with your town hall or a professional.
Why is it so important to accurately calculate the size of your 12V solar installation?
Good sizing ensures you have enough energy without spending too much. If it’s too small, you’ll run out of power. If it’s too big, you’ll have wasted money. Good calculation also prevents battery damage and ensures everything works well and safely.
