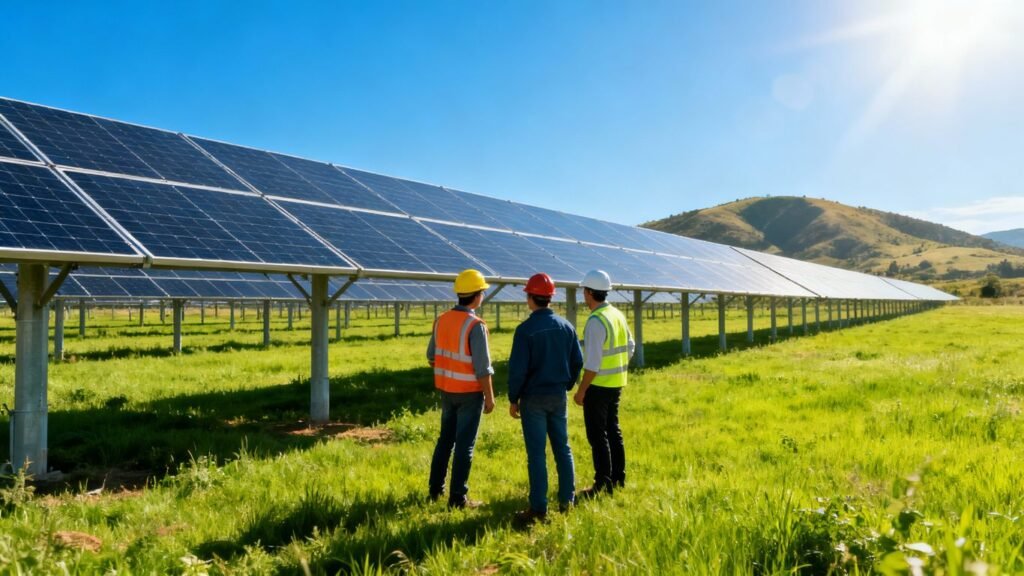
The photovoltaic impact study is an essential step for any project leader wishing to install solar panels, whether on a building, a car park, or on the ground. This process checks technical feasibility, anticipates regulatory constraints, and assesses profitability before getting started. The process may seem lengthy, but it is crucial to avoid unpleasant surprises and to optimise every euro invested. In this article, we will review the main steps to follow to successfully carry out your photovoltaic impact study, with concrete advice and straightforward language.
Key Points to Remember
- Clarify your objectives and context from the outset to frame the photovoltaic impact study.
- Analyse your site’s solar potential, taking into account sunlight, shading, and available area.
- Assess the project’s profitability including all costs, possible subsidies, and expected income.
- Comply with administrative formalities and secure all permissions before starting construction work.
- Plan for regular monitoring and appropriate maintenance to guarantee long-term performance.
Defining the Objectives and Context of the Photovoltaic Impact Study
Identifying Project Motivations
Before launching a photovoltaic impact study, it is vital to clearly state why the project is being considered. Motivations vary according to stakeholders: reducing energy bills, increasing the value of unused land, meeting environmental obligations, or increasing energy independence. Here are some typical examples:
- Adding value to existing buildings through self-consumption.
- Seeking new sources of income through electricity sales.
- Compliance with environmental regulations.
Understanding the purpose of the approach provides a solid direction for the entire process. This first step shapes all the others, from the technical to the economic.
Taking Account of the Regulatory Context
The administrative and legislative context dictates any photovoltaic impact study. This involves identifying obligations concerning planning permission, prior declarations, or compatibility with the local land-use plan (PLU). A thorough check of safety and quality standards is essential (electricity, building strength, etc.).
A project, even a highly promising one, can be halted if it does not meet regulatory requirements. Checks to carry out include:
- Status of the land or building under the PLU
- Potential need for an environmental impact assessment depending on the size of the site
- Compliance with legal timescales for administrative review
Often, analysing the regulatory framework also helps better prepare for responding to a call for tenders or to anticipate mandatory procedures, as highlighted by the photovoltaic call for tenders process.
Defining the Scope of the Study
The precise scope of the study must then be defined: section of roof, land, canopy, etc. The area to be studied is selected based on intended use and actual installation options. This involves:
- Geographically delineating the area of analysis.
- Checking the actual availability and accessibility of the site.
- Identifying any physical or technical constraints (nearby obstacles, shaded areas, etc.).
| Scope Criteria | Points for Attention |
|---|---|
| Available surface | Sufficient for desired capacity |
| Access | Ease of worksite machinery, network connection |
| Incompatibility Risks | Protected zones, easements, heritage |
Carefully defining the context avoids engaging in an expensive study that would lead nowhere. Rigorous framing protects against possible administrative or technical disappointments, giving project holders the best chances of success.
Analysis of Solar Potential and Site Constraints
The analysis of solar potential is the step that determines whether a site has the necessary qualities for a profitable and durable photovoltaic installation. It requires a combination of on-site surveys, weather data, and a thorough understanding of physical or regulatory constraints. Following a methodical process helps reduce unforeseen events during installation.
Sunlight Study and Orientation
The orientation and angle of the site directly influence annual solar output. Thus, you must measure solar exposure throughout the year with precision. Some recommended steps:
- Assess orientation (ideally true south for mainland France)
- Check the slope of the proposed surface (an angle of 30° to 35° often maximises capture)
- Use sunlight simulation tools to anticipate production
Accurate sunlight analysis ensures realistic figures, vital for calculating potential yields. Using a specialist, or an authorised professional, helps interpret the data—especially when securing the electricity connection stage assembling your file and dealing with Enedis.
Analysis of Shading and Obstacles
Even a well-exposed site can have its profitability affected by partial shading. It is necessary to map nearby obstacles (trees, buildings, poles). Here’s how to approach this analysis:
- Carry out topographical surveys or use mobile apps for shadow simulation
- Study the sun’s path season by season
- Consider future developments nearby (new buildings, growing vegetation)
Taking the time to anticipate these obstacles, even minor ones, avoids yield losses often underestimated during the design phase.
Assessment of Structure and Usable Surface
Finally, the structure of the site is crucial: you must ensure stability, accessibility, and the area available. An old roof or unstable ground can jeopardise a project, regardless of sunlight.
Table: Surface and Structure Criteria (example case)
| Criterion | Acceptable | To Monitor | Incompatible |
|---|---|---|---|
| Minimum surface | > 25 m² | 15-25 m² | <15 m² |
| Load capacity | Compliant | Needs reinforcement | Insufficient |
| Shaded surface | <10% of area | 10-25% | >25% |
The site must also meet requirements in terms of accessibility (for installation and maintenance), regulations (urban, agricultural zones, etc.), and distance from transformers large site near an Enedis transformer.
In summary, a detailed study of solar potential and structural constraints forms a robust basis for overall planning and allows for efficient project sizing, avoiding unwelcome surprises later on.
Technical Sizing of the Photovoltaic Installation
Proper technical sizing aims to predict the system’s production capacity accurately, align with the site’s actual energy requirements, and ensure an installation that is both suitable and scalable. The following steps describe how to structure your technical approach, from calculating output to equipment choice.
Calculating Potential Output and Yield
For optimal sizing, you must estimate the site’s actual consumption and link it to the available usable space. Start by compiling consumption readings from recent years and then calculate the installed capacity, expressed in kWp (kilowatt-peak). This target capacity will depend on:
- Available installation area
- Usage patterns (day/night, seasonality)
- Sunlight and technical yields from the chosen technology
| Parameter | Example Data |
|---|---|
| Annual consumption | 35,000 kWh/year |
| Available roof area | 250 m² |
| Estimated installable capacity | 30 kWp |
| Forecasted average yield | 75% – 85% |
For further information, various calculation techniques can be used, sometimes automated via specialist online tools for this type of study.
Choice of Panel and Inverter Types
Choosing the right components is not just about price, but also expected performance, reliability, and mechanical compatibility with the existing structure. Here’s what to compare:
- Panel technology (monocrystalline, polycrystalline, thin-film)
- Certifications and guarantees (IEC, TÜV, CE marks)
- Type of inverter (string, central, or microinverter to optimise for shade levels)
Don’t forget to analyse ease of maintenance and expected lifespan. A comparative study of suppliers often helps identify the best value for money.
Simulation of Expected Annual Production
Next, run a simulation of annual output, considering local weather, panel orientation, and the effects of any shading. Specialist software takes these parameters into account to provide a realistic forecast.
- Obtain historic regional sunlight data
- Configure angle and orientation in the simulator
- Include estimated losses (wiring, conversion, dust, etc.)
The result offers a reliable estimate of the installation’s energy potential.
By taking the time to properly size the system, you minimise operational surprises and guarantee the return on investment for your use case, whether for self-consumption, surplus sale or total resale. The methods and ratios presented for the concept of a solar park usefully complement this structured approach.
Assessment of the Environmental Impact of the Photovoltaic Project
The analysis of environmental effects takes centre stage in any photovoltaic impact study. Every project needs to measure its ecological impact at every stage, from design through commissioning. Here are the essential points to consider:
Assessment of the Installation’s Carbon Footprint
The carbon footprint assessment starts with material selection. This means accounting for emissions from manufacturing, transportation, and installation of the panels. It also includes end-of-life recycling.
| Item Analysed | Emission rate (kg CO₂ eq/kWp) |
|---|---|
| Panel manufacturing | 800–1200 |
| Transport | 50–150 |
| Installation | 10–30 |
| End of life | 20–60 |
There is increasing demand for a specialist engineering firm to calculate this footprint, particularly to ensure increased regulatory compliance (specialist photovoltaic consultancy).
Study of Effects on Biodiversity and Natural Environments
Beyond carbon, the project can alter natural habitats and the movement of wildlife and plants. Three main areas are always addressed:
- Risk of habitat fragmentation for local species
- Disruption of vegetation under the modules or of agricultural land
- New interactions (heat islands, obstacles for wildlife)
Special attention is paid to large ground-mounted installations, as the regulations often require a more advanced environmental approach in this case (ICPE regulatory framework for photovoltaic projects).
Identification of Potential Mitigation Measures
To limit negative impacts, the law requires mitigation measures when ecological neutrality cannot be achieved. Some possible steps include:
- Installing ecological corridors nearby
- Limiting earthworks to preserve local plants
- Commitments to replant native species
- Post-construction monitoring of biodiversity developments
Serious environmental planning for a photovoltaic project isn’t just about complying with the law—it also enhances the project’s image and often makes obtaining authorisations easier.
The environment should never be seen as just a constraint, nor neglected. If well anticipated, it can become a project strength.
Detailed Technical Feasibility Study
The technical feasibility study is a compulsory stage before any investment decision in a photovoltaic project. This is the stage where you really see if the project stands up technically. This involves thorough analysis of the site, supporting structure, access constraints, and connection potential to the grid.
Assessment of Access and Grid Connection Constraints
A detailed assessment is necessary to predict any physical or administrative limitation linked to access or connection to the public electricity network. Points to check include:
- Site accessibility for material delivery and installation
- Proximity and capacity of the existing electrical network
- Presence of easements, land-use planning or environmental constraints
Use of specialist tools, such as power simulators recommended by certain practical guides, helps anticipate how well expected production matches with connection possibilities.
Analysis of the Support: Roof, Ground or Canopy
The choice of support determines installation feasibility. For roofs, check:
- The condition and strength of the framework
- Current watertightness
- Slope and orientation
For ground or canopy installations, the study will look at: - Ground stability
- Usable area available
- Any geotechnical constraints
| Type of Support | Main Check Points | Associated Study Costs |
|---|---|---|
| Roof | Strength, slope, obstacles | €1,000 – €5,000 |
| Ground | Load-bearing, access, permissions | €2,000 – €5,000 |
| Canopy | Foundation, car park usage, shading | €2,500 – €6,000 |
It is not unusual for certain structures to also require a detailed mechanical survey to guarantee the project’s long-term safety and viability.
Assessment of Storage and Self-Consumption Needs
To maximise profitability, you need to consider how the energy produced will be used or stored. The technical assessment looks at:
- The site’s energy consumption profile
- Battery technologies suited to the project
- The balance between self-consumption and grid export
Incorporating storage often helps limit grid exports and allows a higher share of generated energy to be used on site. This approach optimises savings and provides extra flexibility if regulations change.
Once properly established, technical feasibility provides a solid foundation for a reliable, durable project, whether for individual self-consumption or resale to the grid.
Economic and Financial Analysis of the Photovoltaic Impact Study
Financial evaluation of a photovoltaic project is not limited to adding up the costs: it aims to provide a clear picture of project profitability and the mechanisms for financial sustainability. Anticipating all cash flows prevents unpleasant surprises and supports project delivery.
Estimating Investment and Operating Costs
Before starting, it is necessary to break down all expenses. There are two main cost categories:
| Cost Type | Indicative Range (€) | Details |
|---|---|---|
| Feasibility study | 1,000 – 2,500 | Audit, simulation, recommendations |
| Support structure survey | Up to 5,000 | Structural analysis, report |
| Environmental impact study | Up to 40,000 | Large projects, complex sites |
| Equipment purchase & installation | Variable (project size) | Panels, inverters, installation |
| Operation & maintenance | 1 to 2% of initial cost/year | Inspections, minor repairs |
Unique site features, such as difficult access or unusual supports, can significantly alter these costs.
Profitability and Return on Investment Simulation
Estimating profitability means comparing costs and expected revenues over the project’s lifetime. A cash-flow summary must include:
- Initial capital invested.
- Electricity cost savings or income from selling energy.
- Recurring expenses: operation, maintenance, insurance.
- Possible taxes and regulatory developments.
Some typical indicators calculated:
- Payback period (usually 8 to 12 years for self-consumption).
- Internal rate of return (IRR).
- Cumulative gain over 20 or 25 years.
Search for Available Subsidies and Grants
Reducing total cost frequently involves securing support measures. In France, different levers can be activated:
- Self-consumption grant for roof or canopy installations.
- Guarantee tariff for selling all or part of the electricity generated.
- Regional support, Ademe grants for studies or delivery.
- Possible tax advantages depending on the project’s nature and size.
Let’s not forget the positive impact for property value and image: installing photovoltaics not only helps control energy costs but also « greens » your activity. Some companies, such as EDF ENR, offer specific support to maximise economic benefits while delivering responsible solutions reducing electricity bills.
Accessing grants and subsidies requires constant monitoring: their conditions often change, so make sure your project is eligible before spending money.
Administrative Procedures and Required Permissions
Before installing a photovoltaic system, you must complete and comply with all legal formalities. Lack of authorisation may result in halting the project or heavy penalties. The procedures differ depending on the size and location of the solar station: roof, canopy or ground-based installation.
Identification of Mandatory Procedures
Administrative formalities vary according to installed capacity and project location:
- Prior works declaration for low-power installations (often < 3 kWp) or those not visible from public areas.
- Planning permission for ground-based projects or for work on existing buildings over 20 m², or for all roofs in a protected area.
- Environmental authorisation if the project falls under Installations Classified for Environmental Protection (ICPE).
To understand these steps in detail and especially the points linked to the ICPE regime, it may prove useful to review an explanation of how to carry out a regulatory feasibility study for photovoltaics.
Main documents to provide:
- Detailed installation plans
- Certificate of compliance with electrical standards
- Environmental impact study (where applicable)
Obtaining Permits and Prior Declarations
The following steps are often required:
- Submission of an application to the local council (prior declaration or planning permission)
- Consultation with the Architect of Buildings of France if the project is located near a listed site
- Compliance with local planning regulations (PLU or municipal map)
- For new builds, the solar installation must be included at the building permit application stage, as explained in the guidance on integrating photovoltaic panels
| Project Type | Required Authorisation | Estimated Processing Time |
|---|---|---|
| Roof < 3 kWp | Prior Declaration | 1 month |
| Roof/ground > 3 kWp | Planning Permission | 2 to 3 months |
| Near monument / protected | Opinion of ABF + authorisation | 2 to 6 months |
| ICPE project | Environmental authorisation | Up to 1 year |
Getting ahead with the administrative schedule avoids many site delays. Any incomplete or non-compliant file often results in extra delays.
Managing Safety and Planning Standards
Complying with safety and planning legislation is essential for project validation:
- Electrical compliance to NF C15-100 standard
- Ensuring the structure complies with the Planning Code
- Applying special procedures in flood, fire, or “Seveso” zones
Before starting work, systematically check all safety and planning obligations to keep your project safe in the long term.
To avoid beginner’s mistakes, it is better to carefully prepare every administrative file and, if needed, get support from professionals experienced in these complex procedures. This secures the project for the long haul.
Selection of Equipment and Partners for the Photovoltaic Project
Selecting equipment and partners is a vital step to ensure the success and longevity of a photovoltaic project. Behind every equipment or human choice, there are criteria to meet for installation reliability, performance, and compliance with regulations.
Criteria for Choosing Equipment and Certifications
Equipment selection doesn’t stop at brand or price: you must check the panels’ energy performance, manufacturer’s warranty, and compatibility with your site. Ensuring equipment quality significantly reduces the risk of long-term breakdowns. Key criteria include:
- Certifications (e.g.: IEC 61215, IEC 61730, ATEC, Technical Approvals)
- Warranty duration (often between 10 and 25 years for panels, 5 to 10 years for inverters)
- Performance under low light
- Inverters suitable for the site’s size and intended use
- Mounting systems (site/roof compatible)
| Equipment | Key Certification | Typical Guarantee |
|---|---|---|
| Solar Panels | IEC 61215/61730 | 10 to 25 years |
| Inverter | CE, VDE-AR-N 4105 | 5 to 10 years |
| Mountings | ETN, ATEC | 10 to 20 years |
Thoroughly checking certifications protects you from surprises in case of incident or insurance claim.
Choosing Accredited Installers and Consultants
The choice of technical partners is as important as selecting the equipment. Qualification is crucial; opt for RGE QualiPV SPV1 or SPV2 certified installers for regulatory compliance photovoltaic installer qualifications. Some criteria to consider:
- RGE QualiPV certification and experience with similar projects
- Capacity to manage the whole project (study, installation, maintenance)
- Reputation and customer reviews, transparency about previous projects
- Compliance with safety standards, ten-year insurance
- Request several detailed quotations
- Check the company’s financial health
- Favour those located nearby for easier maintenance
Guarantees and Aftercare Services Offered
Beyond installation, carefully assess guarantees and included aftercare. Some businesses provide:
- Preventive maintenance contracts
- Extended equipment warranties
- Remote production monitoring
- Advice on optimising self-consumption
Be sure to get written clarity on:
- The duration and scope of warranties
- Call-out terms in case of fault
- Any additional costs for maintenance or troubleshooting
Finally, with solar sector scams on the rise, it’s advisable to check resources about common solar panel scams.
Good relationships with your partners ensure long-term support and avoid most technical or administrative disputes over time.
Connection Arrangements and Contracts with the Network
Connecting a photovoltaic system to the public grid is an essential step in using the electricity produced, be it for self-consumption or selling excess. Successfully managing this stage determines the project’s safety, profitability, and commissioning.
Grid Connection Steps with the Network Operator
The connection process involves several steps requiring rigour:
- Submission of the grid connection application to the operator such as Enedis, including all technical project details.
- Receipt of a costed offer including pricing, timescale, and conditions.
- Approval and payment of a deposit to start works.
- Works carried out by the grid operator.
- Delivery and checking of regulatory documents prior to commissioning.
Systematic preparation of documents reduces the risk of delays, as detailed on the Enedis Côte d’Azur application file page.
Electricity Sale Contracts: Obligations and Opportunities
There are three main models for selling the electricity from your installation:
- Total self-consumption with no export: No kWh is injected into the network; all production is used onsite.
- Self-consumption with export of surplus: Surplus electricity not immediately used is sold to an obliged purchaser like EDF OA or another operator.
- Total feed-in: All production is fed into and sold to the network.
Each option comes with specific contractual obligations: contract choice, actions with Enedis, compliance with government-set pricing.
| Model | Declaration | Sale of Electricity | Main Benefits |
|---|---|---|---|
| Total self-consumption | Mandatory | No | Bill reduction |
| Self-consumption + sale | Mandatory | Yes (surplus) | Additional income |
| Total sale | Mandatory | Yes | Maximises sales income |
Billing and Output Monitoring Procedures
Once the connection is approved, monitoring output and invoicing becomes vital. This involves:
- Installation of dedicated meters for generation and export.
- Periodic submission of readings to the buyer.
- Preparation and submission of sales invoices.
- Regular production monitoring via an online platform.
Carefully monitoring billing and generation allows you to spot discrepancies, correct issues and check that your earnings match contract terms.
Mastering these arrangements helps you optimise the full economic potential of photovoltaics, especially with the favourable terms set out in the review of photovoltaic grid connection costs.
Planning Installation and Operational Implementation
Successfully installing a solar station is not just about fitting panels. Each practical step requires organisation, rigour, and coordination to avoid unpleasant surprises and guarantee reliable operation from day one. Structured operational planning directly contributes to the project’s long-term performance.
Site Preparation and Construction Planning
Before starting any work, the ground or roof must be completely ready, including:
- Checking and, if necessary, strengthening supporting structures
- Securing the site (fences, signage, protective equipment)
- Clearing brushwood, removing obstacles and potential shading
- Ensuring existing electrical installations meet standards
- Preparing a risk prevention plan in collaboration with the owner
Adhering to these points limits incidents and delays and sets up a healthy base for the rest of the project.
Quality Control During Installation
Throughout installation, every step is subject to strict checks:
- Assembly of support structures
- Successive fitting of panels, DC & AC wiring, then inverter connection
- Checking fittings and wiring are to standard
- Midway inspection at each critical stage
A summary table can structure these checks:
| Step | Who checks | Main items checked |
|---|---|---|
| Structure/supports | Site manager | Stability, alignment |
| Panel fitting | Installer + site manager | Attachment, orientation, cleanliness |
| Electrical wiring | Electrician | Connections, safety |
| Inverters | Electrician | Connection, ventilation |
| Final inspection | Inspection body | Regulatory compliance |
Focussing on technical compliance and timelines from the start ensures safety for people and property.
Commissioning and Verification Protocols
Once everything is installed, it’s time for testing:
- Global check of all connections
- Functional tests of the entire system, including automatic disconnection in the event of grid failure
- Inspection by a certifying body (like Consuel) to validate compliance, including inverter compliance certification
- Official launch, followed by remote monitoring of the system from day one
This phase, often underestimated, marks the true start of the project: it triggers the guarantee, contract signing with the network operator, and billing for generated electricity.
Without these checks, all previous planning and installation effort could be wasted. Nothing is left to chance: installing photovoltaics means anticipating, checking, and validating step by step.
Monitoring, Maintenance and Post-Installation Optimisation of a Photovoltaic Project
Once your photovoltaic station is operational, day-to-day management does not end there. Rigorous monitoring, regular maintenance and ongoing optimisation ensure steady output and energy generation that meets expectations over the long term.
Planning Preventive and Corrective Maintenance
Preventive maintenance is about anticipating issues before they cause expensive failures. Here’s what you should put in place:
- Regular visual checks of panel and cable condition
- Scheduled cleaning to prevent output loss from dust or debris
- Frequent checking of electrical connections and inverters
- Software updates for monitoring systems
If issues arise, corrective maintenance is carried out to restore output swiftly. Some businesses offer contracts including remote monitoring and short-notice site interventions.
Energy Performance Monitoring
Optimising performance of solar installations requires close monitoring using suitable tools, to quickly spot output anomalies or receive alerts if faults occur. For more on the value of this, see Optimising solar installation performance.
Here’s a summary of key performance indicators to track:
| Indicator | Monitoring Frequency | Recommended action |
|---|---|---|
| Output rate | Daily | Act on discrepancies |
| Module voltage | Monthly | Technical inspection |
| Panel cleanliness | Quarterly | Clean if needed |
Analysing discrepancies allows maintenance to be adjusted quickly and prevents small issues turning into significant financial losses.
Adjustments to Maximise Self-Consumption
To get the most out of your installation, tweaking certain aspects often pays off:
- Adjust electrical usage times to match peak solar production
- Install batteries or storage devices to use energy produced at night
- Configure inverters or smart home systems according to changing requirements
Efficient management of monitoring and maintenance is not just a technical detail: it ensures the investment lasts and actively supports the energy transition.
Over time, don’t hesitate to consult experts or request updates, as the sector evolves quickly. Taking care of your installation today guarantees your energy independence tomorrow.
After installing solar panels, you need to monitor and maintain them so they keep performing well. Good monitoring lets you spot if everything is working as it should. Even small adjustments or a bit of cleaning can make a big difference to output. Want to know more about maintenance or optimising your installation? Visit our site to find out how we can help.
Conclusion
To conclude, conducting a photovoltaic impact study is not just a bureaucratic formality. It is a process requiring time, method, and sometimes a little patience. Every step, from site analysis to financial review, is important to ensure that the project will meet your needs and suit your environment. This preparatory work prevents unpleasant surprises and ensures long-term installation success. If you are considering getting started, do not hesitate to seek the support of competent professionals. They will guide and advise you, even on the simplest questions. A well-prepared project is the key to enjoying all the benefits of photovoltaics with complete peace of mind.
Frequently Asked Questions (FAQ)
What is a photovoltaic impact study?
A photovoltaic impact study is an analysis to check if a solar panel project is possible and beneficial for a given site. It looks at available sunlight, the rules to follow, costs, and the effects on nature.
Why is it necessary to carry out a study before installing solar panels?
This study is important to make sure the installation will work well, be profitable, and comply with the law. It also helps pick the best solutions for the location.
Who can carry out a photovoltaic impact study?
A specialist engineering office or a professional installer can carry out this study. They have the tools and knowledge needed to properly evaluate the project.
What are the main points covered in an impact study?
It looks at sunlight levels, possible shadowing, the strength of the roof or ground, electricity needs, local rules, costs, and environmental effects.
How much does a photovoltaic impact study cost?
The price varies according to project size. For small installations, it can cost between €1,000 and €2,500. More detailed studies can be more expensive.
Do you need permission to install solar panels?
Yes, you usually need to make a prior declaration or apply for planning permission, especially for larger installations. You must also follow local council rules.
Can you install solar panels anywhere?
No, you must check that the roof or land is well exposed to the sun, not too shaded, and that the structure is strong enough. Some protected zones have special rules as well.
How can you tell if a photovoltaic project will be profitable?
The impact study helps estimate electricity production and potential savings. It takes into account costs, financial assistance, and the sale price of electricity if you sell the energy produced.