
Before installing even the smallest component of your future photovoltaic system, meticulous preparation is essential. This phase, often referred to as ‘pre-construction’, is the foundation for the success of your project. It allows you to anticipate difficulties, ensure regulatory compliance, and guarantee everyone’s safety. Following these key steps ensures an efficient and durable installation.
Key Takeaways
- The administrative and project design preparation phase is crucial. It includes regulatory procedures and the validation of execution plans to launch orders.
- A precise assessment of your current and future electrical needs, as well as your roof’s potential, is essential for correctly sizing the installation.
- Site security and good logistical organisation, including team protection and material storage, are absolute priorities before work begins.
- Coordination with other trades, such as roofing or electrical work, and the completion of preparatory work are necessary for a harmonious integration of the system.
- The compilation of technical information and the preparation of specific tools are essential for successfully carrying out each stage, from panel fixing to final connection.
Administrative Preparation and Project Design
Before considering panel installation, it is essential to go through a rigorous administrative and design phase. This step requires patience and precision, as it lays the groundwork for the entire future installation. Ignoring these procedures could lead to complications later on.
Pre-Construction Administrative Procedures
The first thing to do is to ensure that all necessary authorisations are obtained. This generally includes a prior declaration of works to your local council, especially if your installation alters the external appearance of your building. You must also consider the connection request to Enedis, the electricity distribution network operator. This process can take several months, so it is best to start early. Once these steps are completed, you must obtain the electrical conformity certificate, issued by the Consuel organisation, which validates the safety and compliance of your installation with current standards. It is often advisable to delegate these procedures to a professional to ensure they are carried out correctly.
Refining Technical Details and Execution Plans
Once authorisations are in hand, the design office focuses on the technical details. This is the time to finalise the execution plans. These plans specify the exact location of the panels, the cable routing, the inverter configuration, and the connection point to your home’s electrical network. They are essential for coordinating the various trades involved in the project, such as roofers, carpenters, and electricians. The precision of these plans is paramount to avoid any errors during the construction phase.
Plan Validation and Order Placement
Before ordering materials, the execution plans are submitted to all stakeholders: the client, the project manager, the architect, and the inspection office. This collective validation ensures that everyone agrees with the project design. Once the plans are approved, orders for solar panels, inverters, mounting systems, and other components can be placed. This is also when the intervention date for the start of the work is set. Good planning of these orders is important to meet the project schedule and ensure equipment availability.
It is important to fully understand the various administrative steps for a successful solar project.
The administrative and design phase is often underestimated, but it is fundamental to the success of your photovoltaic installation. It allows for anticipating potential problems and ensuring implementation that complies with standards and expectations.
Here is an overview of the key steps:
- Obtaining planning permissions (prior declaration of works).
- Connection request to Enedis.
- Validation of execution plans by all stakeholders.
- Ordering of necessary installation materials.
Assessing your household’s energy needs is an essential preliminary step to correctly size your installation. You can consult your past consumption to better estimate your electricity consumption.
Assessment of Needs and Installation Potential
Before embarking on solar panel installation, it is crucial to fully understand your current and future energy needs, as well as your site’s potential. This diagnostic step allows for correctly sizing your system and optimising its performance.
Analysis of Household Electricity Consumption
To begin, you need to examine your usual electricity consumption. Look at your energy bills to find your annual consumption in kilowatt-hours (kWh). This will give you a basis for estimating the size of the necessary installation. It is also useful to look at your Linky meter data on the Enedis website to get a more precise idea of your consumption habits. Understanding when you consume the most electricity is as important as knowing how much you consume.
Assessment of the Roof’s Photovoltaic Potential
The next step is to assess your roof’s potential for solar production. Tools such as your local council’s solar cadastre can help you. You need to consider your roof’s orientation, its inclination, and, most importantly, the absence of obstacles that could create shade on the panels. In France, a solar installation generally produces between 800 and 1,500 kWh per kilowatt-peak (kWp), depending on sunlight conditions. Good sun exposure is therefore a key factor for maximising your production.
Anticipating Future Consumption
A solar system is a long-term investment, often over 20 years. Therefore, consider your future needs. If you plan to buy an electric car, install a heat pump, or add other energy-intensive appliances, you must take this into account now. Including these future consumptions in your initial calculation helps avoid having to expand your installation later, which would be more costly.
Here are some points to consider when anticipating your needs:
- Plans to purchase an electric vehicle.
- Installation of more efficient heating or air conditioning appliances.
- Changes in household composition (more people).
- Evolution of existing appliance usage.
Good planning of your current and future needs is the key to a profitable solar installation tailored to your long-term situation. This allows you to make informed choices and avoid unforeseen expenses.
Site Security and Logistics Preparation
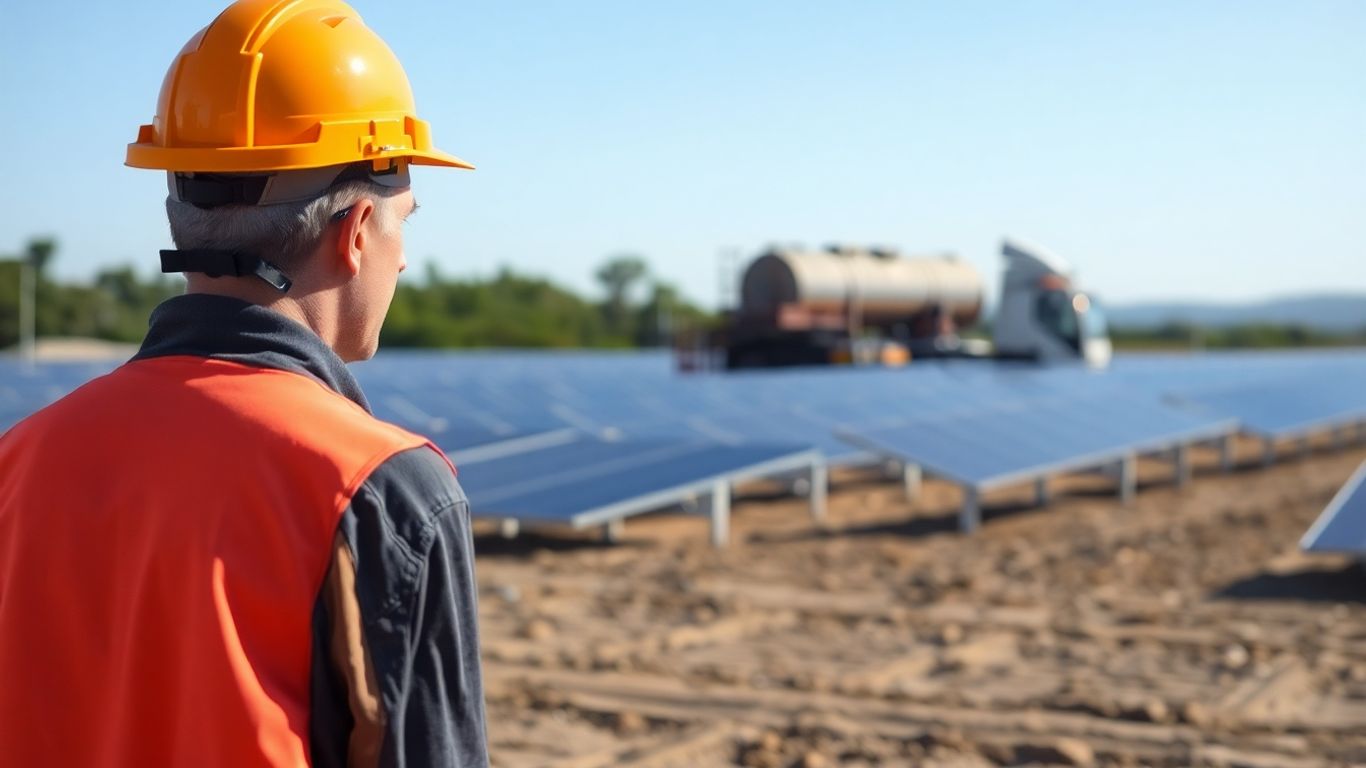
Before installing even the smallest panel, everyone’s safety is the absolute priority. This is a step that allows for no compromise. It involves implementing the necessary protections for the teams working on site, as well as for anyone else who might be there. We first consider collective protection equipment, such as scaffolding or guardrails. If these are not feasible, we move on to individual protection equipment: harnesses, lanyards, and solid anchor points. This is a matter of common sense and compliance with current standards.
Implementation of Collective and Individual Protection Equipment
The first day on site is often dedicated to installing these safety devices. This may include setting up a security perimeter with clear signage. The objective is to delineate the intervention area and alert to potential risks. The choice between collective and individual protections will depend on the specific site configuration and building constraints. It is important to thoroughly assess these elements beforehand to choose the most suitable and safest solution. Team training in the use of this equipment is also a key point.
Organisation of the Material Storage Area
A dedicated space must be provided for storing all materials to be used. The size of this area will, of course, depend on the scale of the project. Solar panels, for example, represent a significant volume. It is important that this space is secure and protected from the elements if possible. Good organisation here helps avoid time loss and risks of damage to components. Consider easy access for receiving deliveries and for distributing materials to the installation area. Good stock management also guarantees efficiency for the entire photovoltaic construction site.
Planning for Team and Stakeholder Safety
Beyond equipment, genuine safety planning is required. This involves developing a prevention plan that identifies specific risks to the site and the work to be carried out. This plan must be communicated to all involved parties. Consideration must also be given to managing site access and incident procedures. Coordination with other trades present on site is also essential to avoid scheduling conflicts or shared danger zones. Good communication and constant vigilance are the watchwords for an incident-free operation.
Preparatory Works and Coordination of Trades
Before laying the first stone, or rather the first panel, meticulous preparation is essential. This phase of preparatory work and coordination of the various trades ensures that the project runs smoothly and that the photovoltaic installation is perfectly integrated. It involves ensuring that everything is ready to accommodate the solar system, in harmony with any other work that might be taking place on site.
Identification of Necessary Preparatory Works
Several types of work may be necessary before the start of solar panel installation. First, it is important to precisely define what falls under your responsibility and that of the installer. Often, earthworks are required to route the electricity produced to the connection point. It may also be necessary to prepare site access for teams and equipment.
- Preparation of foundations or supports for ground-mounted structures.
- Installation of cable trays or necessary trenches.
- Verification of the strength and suitability of the framework or roof to support the weight of the panels.
Coordination with Roofing and Carpentry Works
Technical compatibility between the photovoltaic installation and the existing structure is paramount. If roofing or carpentry work is planned in parallel, close coordination is necessary. It must be ensured that the solar panel fixings will be correctly integrated without compromising the waterproofing or structural integrity of the roof. Good communication with roofers and carpenters helps avoid technical conflicts and delays. For example, it is important to jointly define the fixing points and cable routes for optimal integration.
Collaboration with Utilities and Electrical Works
Roads and various networks (VRD) works and electrical works are often linked to solar installation. For ground-mounted installations, a trench may be necessary for connection to the grid. Regarding electricity, if the installation is for self-consumption, the connection is generally made to the main electrical panel. It is sometimes essential to make modifications to this panel, such as bringing it up to standard, extending it, or increasing cable cross-sections. Working closely with your usual electrician is an advantage, as they are familiar with your building. Good coordination ensures that all electrical aspects are managed in accordance with current standards.
It is also important to ensure that the execution plans are validated by all stakeholders before placing material orders and setting intervention dates. This includes the project management, the architect, and the inspection office, as well as the teams in charge of other technical packages. Once these plans are approved, orders can be launched, marking a key step before the actual start of the work. Obtaining the electrical conformity certificate, such as Consuel, is a final step before commissioning, certifying that the installation complies with all safety standards. You can find more information on the procedures to follow for a successful solar installation in Gironde.
Location Selection and Installation Optimisation
Choosing the location for your solar panels is a decisive step to maximise energy production. You must ensure that the chosen area is clear of any potential obstacles such as chimneys, trees, or roof windows. The main objective is to capture the maximum solar radiation throughout the day.
Selection of the Optimal Solar Panel Location
For maximum efficiency, the orientation and inclination of the panels are paramount. A due south orientation is generally ideal in the northern hemisphere, but south-east or south-west orientations can also be very effective. The inclination must be adapted to the latitude, but an inclination between 30 and 35 degrees is often a good compromise for optimised annual production. It is important to consider the available space and the building’s structure to determine the best arrangement. The analysis of your roof’s potential can be done using tools such as your local council’s solar cadastre to evaluate my quote.
Minimising Shading and Observing Safety Distances
Shading, even partial, can significantly reduce your panels’ performance. It is therefore essential to identify and avoid any source of cast shadow, whether from built elements or vegetation. For roof installations, it is recommended to leave a space of approximately 30 cm between the edge of the roof and the panels to manage wind-related constraints. For flat roofs, a thorough study of ballasting is necessary, taking into account local climatic conditions.
Good location planning not only optimises production but also guarantees the longevity and safety of the installation.
Positioning of Ancillary Equipment
It is important not to forget to plan the location of ancillary equipment, such as the inverter and the protection box. These elements must be installed in an accessible, well-ventilated, and weather-protected location. It is advisable to place them at a minimum height of 80 cm from the ground to facilitate maintenance and comply with safety standards. The cable routing from the panels to this equipment must also be carefully studied to minimise losses and ensure a clean and compliant installation to connect a solar panel to a battery.
Compilation of Technical Information and Necessary Tools
Before starting the installation of your photovoltaic system, it is essential to gather all required documents and tools. This step prepares the ground for a smooth workflow and minimises unforeseen events on site. Good upstream organisation is key to a successful and compliant installation.
Gathering Equipment Technical Manuals
Each component of your installation, whether solar panels, inverter, mounting systems, or cabling, comes with its own technical manual. These documents provide detailed information on specifications, installation procedures, safety instructions, and maintenance. It is highly recommended to consult and retain these manuals. They are often the reference for the proper functioning and longevity of your equipment. For example, the inverter manual will detail electrical connection procedures and configuration parameters to adjust. You can find useful information on installing photovoltaic systems in specific installation manuals, which highlight the importance of these documents for the safety and proper functioning of the system [9c0a].
Identification of Tools for the Mounting Structure
The structure that will support your solar panels requires specific tools for its installation. Here is a list of commonly used tools:
- Tape measure and chalk line: For precise marking of locations and alignment of fixings.
- Screwdriver/Drill: Essential for securely fixing rails and supports.
- Appropriate wrenches/spanners: For tightening nuts and bolts according to specifications.
- Spirit level: To ensure the structure is perfectly horizontal or vertical.
- Protective gloves: For safely handling metal components.
Preparation of Tools for Module and Inverter Installation
Once the structure is in place, the installation of panels and the inverter requires other tools. For the panels, a screwdriver/drill will again be necessary for their fixing to the rails. Tools for handling the panels, which can be heavy and bulky, must also be provided. For the inverter, a drill will be useful for fixing it to the wall, accompanied by appropriate screws and bits. A marker pen can be used to mark drilling points. It is also important to provide tools for cable routing, such as wire cutters and cable ties. The preparation of these tools ensures an efficient and secure installation, in accordance with good design and installation practices for photovoltaic systems [af36].
The rigorous compilation of technical manuals and adequate preparation of tools are not mere formalities. They form the basis of a reliable, secure, and high-performing photovoltaic installation. Neglecting this step can lead to costly errors and compromise your system’s energy production.
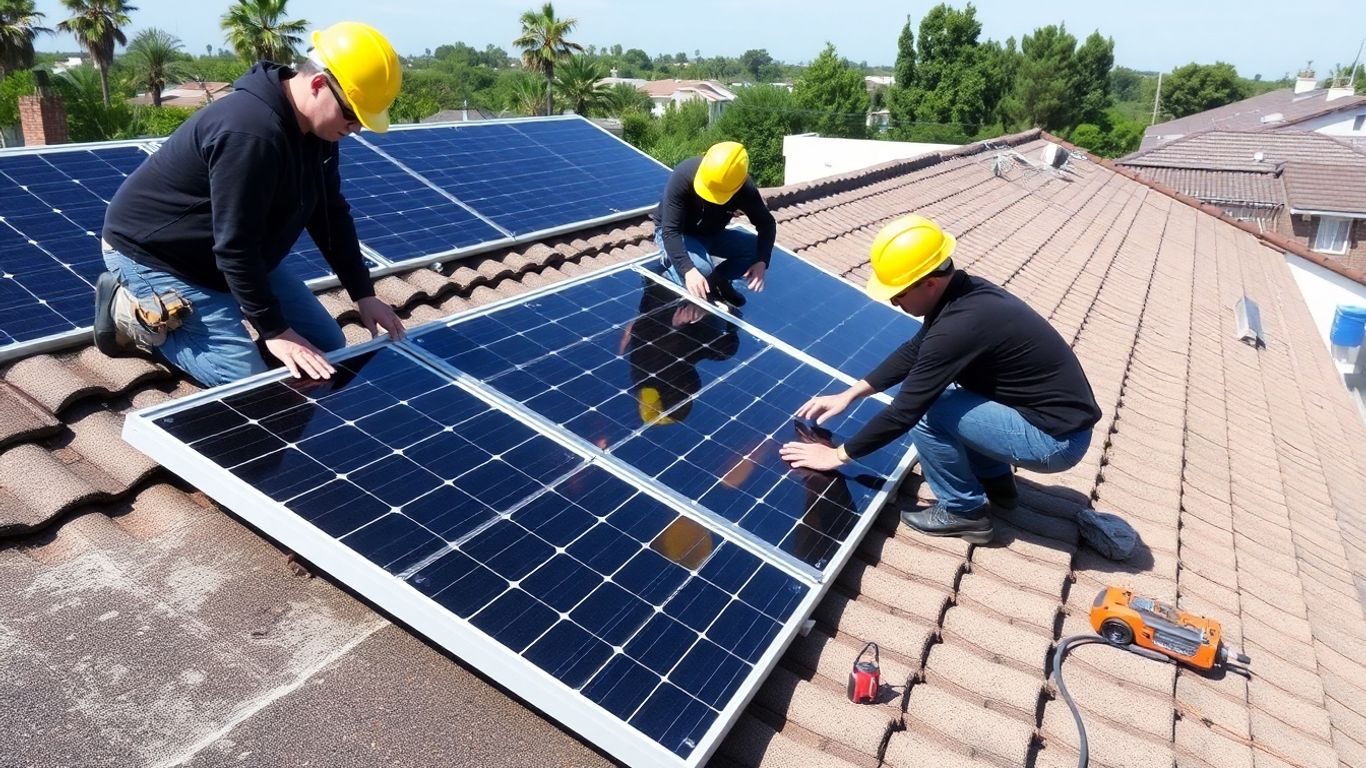
Implementation of the Integration System
Before solar panels can be fixed, the integration system must first be installed. This system creates the mechanical link between your roof and the panels. There are different types of systems, adapted to each roof covering. It is important to choose the one that best suits your situation.
Understanding the Role of the Integration System
The integration system is the base upon which the solar panels will rest. It ensures the mechanical fixing and stability of the entire assembly. Good integration is also important for the aesthetics of the installation. It must be ensured that the chosen system is compatible with the type of roofing and that it complies with current standards. Poor integration can cause waterproofing or wind resistance issues.
Selection of the System Adapted to the Roof Covering
The choice of integration system will depend on your type of roofing: tiles, slates, steel deck, flat roof, etc. Each material has its specificities and requires an adapted fixing solution. For example, for a tiled roof, specific hooks that attach under the tiles will be used. For a steel deck roof, direct fixings with self-drilling screws will be more appropriate. It is essential to consult the technical specifications of each system to ensure its compatibility and performance. Good selection maximises the lifespan of the installation and guarantees its safety.
Importance of Precision During Installation
The installation of the integration system requires great care and precision. Each element must be correctly positioned and fixed. Meticulous work at this stage avoids subsequent problems, such as water leaks or fixings loosening over time. Teams must be trained to handle these systems rigorously. Imprecise installation can delay the rest of the project and affect the overall performance of the photovoltaic system. It is therefore recommended to use qualified professionals for this operation.
Here are the key steps for correct installation:
- Verification of the framework and roofing.
- Installation of fixing rails according to the installation plan.
- Fixing the rails to the roof structure.
- Verification of rail alignment and level.
Careful integration is the primary guarantee of a high-performing and durable solar installation. It ensures not only the mechanical stability of the panels but also the waterproofing of your roof. It is therefore crucial not to neglect this preparatory phase.
The choice of panel inclination angle is also an important factor for optimising energy production. The right balance must be found to capture maximum sunlight throughout the year, taking into account the geographical location of your installation.
Cable Routing and Pulling
Once the solar panels are fixed and connected to each other, it’s time to consider routing the electricity produced. This step involves running the solar cables from the panels to the inverter. Precise technical standards must be adhered to for these cables, particularly regarding anti-UV treatment and double insulation, to guarantee their durability and the safety of the installation. The minimum cable cross-section is also an important point to consider to avoid overheating.
The wiring diagram must follow the inductance rule, as described in the UTE C 15-720-1 photovoltaic installation guide. This means that connections and cables must be installed in a way that prevents any deterioration caused by external factors. It is advisable to consult the UTE C 15-520 practical guide for more details on implementation. Once the cables are pulled, they are generally routed on the roof, then on the facade or inside the building via covered cable trays, to the location of the inverters. For outdoor cable routing, a 25mm diameter IRL conduit is often recommended, while indoors, 40x20mm PVC electrical trunking is perfectly suitable.
Compliance with Technical Standards for Solar Cables
Cables used for transporting direct current (DC) from solar panels to the inverter must meet specific requirements to ensure the safety and performance of the installation. These cables are designed to withstand outdoor conditions, such as exposure to ultraviolet (UV) rays and temperature variations. They generally feature double insulation to prevent electrical risks and are manufactured with weather-resistant materials. Choosing the correct cable cross-section is also paramount; a cross-section that is too small can lead to overheating and energy loss, while an appropriate cross-section minimises resistance and optimises efficiency. It is important to refer to manufacturer specifications and current standards, such as UTE C 15-720-1, to select the appropriate cables. For cable routing, the use of resistant outdoor conduits is advised, as explained for connecting an outdoor swimming pool cover.
Application of Wiring and Inductance Rules
The arrangement of cables and how they are connected have a direct impact on the performance and safety of the photovoltaic system. Adherence to the inductance rule is a major concern. This involves minimising cable loops and maintaining a certain distance between positive and negative conductors to reduce electromagnetic interference. Poor inductance management can affect current quality and potentially damage equipment. It is therefore essential to scrupulously follow the wiring diagrams provided by the manufacturer and the recommendations of standards, such as UTE C 15-520, which details good practices for electrical installation. Rigorous cable organisation, using appropriate cable trays and securely fixing cables, contributes to the longevity and reliability of the installation.
Organisation of Cable Routing to Inverters
The path of the cables from the panels to the inverter must be carefully planned. The most direct and safest route must be identified, taking into account architectural constraints and regulations. Cables can be routed across the roof, then down the facade, or inside the building via conduits or cable trays. These, often covered, protect the cables from physical damage and the elements. It is important to ensure that cable trays are well ventilated to prevent overheating. Cables must be secured with appropriate clips or ties, at regular intervals, to keep the assembly in place and prevent them from hanging or tangling. Good organisation of cable routing also facilitates future maintenance operations.
Here is an overview of the elements to consider for cable routing:
- Cable Protection: Use of conduits (IRL, trunking) to protect cables from mechanical and environmental damage.
- Routing: Choosing a logical and secure path, minimising unnecessary lengths and risks of damage.
- Fixing: Ensuring cables are securely held throughout their path using appropriate clips or ties.
- Compliance: Adherence to current electrical standards (UTE C 15-720-1, UTE C 15-520) to guarantee safety and performance.
Installation and Connection of Inverters
Once the solar cables have been routed to the designated location for the inverters, whether installed indoors or outdoors, the next step is to fix and connect these essential devices. Inverters play a key role in converting the direct current (DC) produced by the panels into alternating current (AC) usable by your home or the electrical grid. These units are generally wall-mounted, requiring particular attention to ensure their stability and accessibility for potential maintenance.
Role of Inverters in Energy Conversion
The inverter is the heart of your photovoltaic system. It takes the direct current generated by the solar panels, which is unstable and variable depending on sunlight, and converts it into alternating current, which is stable and compliant with electrical grid standards. This conversion is essential for the electricity produced to power your household appliances or be fed back into the grid. There are different types of inverters, such as central inverters or micro-inverters, each with its technical specificities and advantages depending on the installation’s configuration. The choice of inverter directly impacts the overall performance of the system.
Wall Mounting of Inverters
Inverters must be carefully mounted. They are generally fixed to the wall using robust brackets. It is important to choose a location that allows for good ventilation, as inverters can heat up during operation. Sufficient space around the unit will also facilitate maintenance or replacement operations. Ensure that the chosen wall can support the inverter’s weight and that it is protected from the elements if installed outdoors. Good ventilation is crucial for the proper functioning and longevity of the unit, as seen with certain remote monitoring solutions.
Connection of Solar Cables to Inverters
The connection of solar cables to the inverter’s input terminals (DC side) must be carried out rigorously. The polarity (+ and -) of each connection must be observed to avoid any damage to the equipment. Cables must be correctly crimped and inserted into MC4 connectors or equivalents, then securely fixed to the inverter’s DC inputs. It is also necessary to connect communication cables, if present, to allow for monitoring of the system’s performance. Once the DC connections are made, the AC cables from the electrical panel will be connected to the inverter’s output. It is recommended to make these connections when the panels are not exposed to direct sunlight to minimise electrical risks.
Final Electrical Connection and Commissioning
The final phase of your photovoltaic project involves connecting your entire installation to the existing electrical grid and officially commissioning it. This step, although final, requires particular attention to guarantee the safety and efficiency of your system.
Connection of the Installation to the Electrical Panel
The alternating current (AC) produced by the inverters is routed via a single cable to the main electrical panel of your home or building. This connection is generally made at the main low-voltage distribution board (TGBT) or directly at the delivery point designated by the network operator. It is essential that this connection is carried out by a qualified professional, adhering to current electrical standards to avoid any risk of overload or malfunction. The installation of a specific protection box, often called an AC PV box, is common practice to centralise and secure this connection point.
Electrical Precautions During Connections
Before any manipulation, it is imperative to ensure that all circuits are de-energised. Solar cables, whether direct current (DC) or alternating current (AC), must be correctly identified and handled with care. Adherence to wiring diagrams and inductance rules, such as those described in UTE guides, is paramount to prevent interference and potential degradation. Particular attention must be paid to the earthing of all metallic components, including module frames, for optimal protection against overvoltages and insulation faults. Good organisation of cable routing, particularly in covered cable trays, contributes to their protection and the longevity of the installation.
Compliance Verification Before Commissioning
Before your system can be activated, a series of checks and tests are necessary. This includes confirming the correct connection of all elements, verifying the absence of insulation faults, and measuring voltages and currents. It is highly recommended to engage an independent inspection body to validate the installation’s compliance with current electrical standards. This external check allows for obtaining the Consuel certificate, an essential document to attest to the safety and compliance of your photovoltaic power plant. The implementation of a remote monitoring solution is also advisable to track your installation’s performance and be alerted in case of a problem. Access to the monitoring platform will allow you to view energy production in real-time and analyse data over the long term, once your solar installation is operational.
Commissioning marks the beginning of green energy production by your system. This is when your investment starts to yield benefits, both economically and environmentally. A detailed presentation of equipment operation and safety measures to adopt during operation will be provided by the project manager.
Once your solar installation is ready, we take care of everything for the final electrical connection and commissioning. This is the last step before you can enjoy your new green energy! Want to know more about this process? Visit our website to discover how we make this transition simple and efficient for you.
Conclusion: Towards a Successful Solar Installation
By following these preparation steps, you put all the chances on your side for your photovoltaic installation project to run smoothly. Good planning, a clear understanding of preparatory work, and anticipation of logistical and technical needs are the keys to effective implementation. Remember that every detail counts to guarantee the performance and durability of your solar system. A methodical approach will allow you to fully enjoy the benefits of solar energy for your home or business.
Frequently Asked Questions
What are the first things to do before starting work to install solar panels?
Before installing even the smallest panel, you need to sort out the paperwork. You must apply for the necessary authorisations, such as planning permission if required. Then, you need to carefully consider how the installation will work: how much electricity you consume, how much the panels will produce, and where to place them so they receive as much sunlight as possible. It’s like preparing a plan before building a house.
How do I know how many solar panels are needed for my house?
To find out how many panels you need, you should look at how much electricity you use in a year. Check your electricity bills. Also, consider what you will use in the future, such as an electric car or a heat pump. The more you consume, the more panels will be needed to cover your needs.
Can I install the solar panels myself or should I hire a professional?
You can certainly install the panels yourself if you are handy and enjoy DIY. However, be aware that this work requires precision and there are safety rules to follow, especially when working at height. If you are unsure, it is better to ask a professional who knows exactly how to do it.
What is the integration system and why is it important?
The integration system is what allows the solar panels to be fixed to your roof. It’s a bit like the skeleton that holds the panels. There are systems for all types of roofs. This system must be properly installed, because if there’s a leak or if it’s not securely fixed, it can cause problems later on.
How are the solar panel cables routed to the inverter?
The cables connecting the solar panels to the inverter are special. They must be protected from the sun and water. They are routed through conduits, either outside along the wall or inside the house in trunking, so they reach the inverter’s location.
What precautions should be taken during the electrical connection of the solar installation?
When connecting the panels and the inverter to the electrical panel, extreme caution is required. Panels produce electricity as soon as there is light, even if it’s not direct sunlight. Therefore, you must ensure that everything is switched off before touching the wires to avoid electric shocks.
What tools are needed to install solar panels?
To install solar panels, you need the right tools. There are tools for fixing the structure to the roof, such as a drill and a tape measure. You also need tools for connecting the cables and installing the inverter, such as a screwdriver and a spirit level. And of course, you must not forget safety gear for working safely.
What happens if my roof is shaded by trees or buildings?
If your roof is often shaded, it can reduce the amount of electricity your panels produce. You should try to choose the least shaded spot possible. Sometimes, special systems can be used to better capture sunlight even with some shade, but it’s less efficient than if the roof is well-exposed to the sun.