
A solar panel captures sunlight and converts it into electricity. This technology, called photovoltaics, may seem complex, but the principle is actually very simple. In this guide, we explain step-by-step how it works, with clear explanations and no unnecessary jargon – so you can understand before you decide.
Key Takeaways
- The basic principle of a solar panel is to convert sunlight into direct current electricity through the photovoltaic effect. This current is then transformed into alternating current, which can be used by your household appliances.
- The electricity produced can be consumed directly in your home, stored in a battery for later use, or sold back to the electricity grid.
- To optimise production, orienting panels towards the south and an inclination of approximately 30 to 35 degrees are generally recommended, although sunshine and temperature also play a role.
- There are different types of solar panels, such as monocrystalline (more efficient) and polycrystalline (more economical), each with specific yields.
- Before installation, administrative procedures are necessary, including a prior declaration of works at the town hall and a connection request to Enedis, often followed by a Consuel certificate.
Understanding How a Solar Panel Works
Before you embark on installing solar panels, it’s important to grasp how they transform sunlight into usable electricity. This process, while technological, is based on fairly straightforward physical principles.
The Principle of Converting Light into Electricity
The core of the photovoltaic system lies in the ability of the cells that make up the panels to react to light. When photons from the sun strike these cells, they excite the electrons present in the semiconductor material (often silicon). This electronic agitation creates movement, a flow of electrical charges. It is this flow of electrons that constitutes direct current (DC) electricity. Silicon, due to its properties, is particularly well-suited for this effect, acting as a multitude of mini-generators when assembled into a cell.
Essential Components of a Photovoltaic Panel
A photovoltaic solar panel is a precise assembly of several elements designed to capture solar energy and convert it efficiently. Here are the main components:
- Photovoltaic cells: These are what convert light into electricity through the photovoltaic effect.
- Encapsulating layers: Usually made of polymer, they protect the cells from external damage and impacts.
- Glass layers: Two thick panes of glass, often treated to withstand weather and optimise light transmission, enclose the cells.
- Frame: Usually made of aluminium, it provides rigidity to the assembly and facilitates panel mounting.
These elements work together to ensure long-term energy production.
The Photovoltaic Effect Explained Simply
The photovoltaic effect, discovered by Alexandre-Edmond Becquerel, is the physical phenomenon underlying electricity production by solar panels. In simple terms, when a particle of light (a photon) strikes a semiconductor material like silicon, it transfers its energy to it. This energy is sufficient to release an electron from its atom. As photovoltaic cells are designed with internal electric fields, these released electrons are directed in a single direction, thus creating a direct current. This current is then ready to be used or transformed to power your appliances. The efficiency of this process depends on the quality of the cells and the sunshine conditions, directly influencing the amount of electricity produced. It is important to note that production is limited at night and on cloudy days, as it depends on weather conditions. For immediate use of the energy produced, you can opt for self-consumption without a battery.
The operation of a solar panel can be summarised by a simple chain: sunlight hits the panel, the photovoltaic cells generate a direct current, which is then transformed into alternating current usable by your household appliances.
The Journey of Solar Electricity in Your Home
Once your solar panels have captured sunlight and converted it into electricity, this energy begins a journey through your home. This journey is essential for you to benefit from the clean energy you produce.
Converting Direct Current to Alternating Current
Photovoltaic panels generate direct current (DC). However, most electrical appliances we use daily run on alternating current (AC). This is where a key component comes into play: the inverter. This device, often installed near your electrical panel or sometimes directly on the panels (micro-inverters), is responsible for converting direct current into alternating current. This conversion is essential for solar electricity to be compatible with your home’s electrical system. Without this step, the energy produced by your panels would be unusable for your lights, refrigerator, or television.
Routing to Your Electrical Panel
After being converted by the inverter, the alternating current is routed to your main electrical panel. This is the nerve centre of your electrical installation. The electrical panel then distributes this electricity to the various circuits in your home. It acts as a distributor, ensuring that each appliance receives the energy it needs. It is also at this level that real-time consumption can be monitored and different energy flows managed. Connection to the public grid also occurs via this panel, subject to the necessary authorisations.
The Different Destinations for Produced Electricity
The solar electricity that reaches your home can take several paths, depending on your needs and your installation:
- Direct self-consumption: The energy is immediately consumed by your electrical appliances. This is the case when you use your appliances while the panels are producing electricity.
- Injection into the grid: If your production exceeds your immediate consumption, the surplus electricity is injected into the public grid. This electricity can be sold, generating additional income and contributing to the profitability of your installation. It’s a way to make the most of every kilowatt-hour produced.
- Storage in a battery: If you have a storage battery, the excess energy can be stored for later use, for example in the evening or on less sunny days. This increases your energy independence.
The journey of solar electricity is a well-orchestrated process, from capturing light to its use in your home. Each step is designed to maximise the benefits of your solar investment, whether it’s to reduce your bills or contribute to a cleaner environment. The goal is to make your home more energy-independent through solar energy.
Understanding this energy flow allows you to better grasp the overall operation of your installation and optimise your consumption to get the most out of it.
Optimising Solar Energy Production
To get the most out of your photovoltaic installation, several factors come into play. Simply placing panels randomly is not enough; careful consideration of their placement and environment is necessary to maximise the amount of electricity produced.
The Importance of South-Facing Orientation
The most favourable orientation for solar panels is undoubtedly south. This is the side where the sun shines longest throughout the day, especially in the Northern Hemisphere. A south-facing orientation allows for maximum capture of solar radiation over the year.
- A south-facing orientation can increase annual production by approximately 10% compared to an east or west orientation.
If your roof does not allow for an ideal south-facing orientation, east and west orientations can be considered. Distributing panels across these two orientations helps to smooth out production throughout the day, capturing the sun in the morning to the east and in the afternoon to the west, although overall production will be slightly lower than a single south-facing orientation.
The Ideal Inclination of Solar Panels
The angle of inclination of your solar panels is also a parameter not to be overlooked. It influences how the sun’s rays strike the panel surface throughout the seasons. The goal is to find an angle that optimises light capture over the entire year.
Most residential installations in France benefit from the natural slope of their roof, often between 30° and 35°. This angle is generally considered optimal for balanced annual production.
- An inclination of 30° to 35° is often recommended for a good annual compromise.
- In some regions, adjustments may be necessary depending on the latitude.
- Mounting systems allow for adjusting the inclination if the roof is not ideal.
The Impact of Sunshine and Temperature
The sunshine in your region is the most obvious factor for solar energy production. The more sun there is, the more electricity your panels will produce. However, temperature must also be considered.
Contrary to what one might think, solar panels perform less well when they overheat. Excessive heat can reduce their efficiency. This is why good ventilation around the panels is important. So-called ‘hybrid’ panels actually aim to utilise this heat to produce domestic hot water, thereby improving their overall efficiency.
The temperature of photovoltaic cells has a direct impact on their performance. Excessive heat can reduce electricity production. It is therefore beneficial to ensure that the panels are not confined in an area where heat accumulates.
Here are some factors that influence production:
- Annual sunshine: Varies by region and by year.
- Ambient temperature: Panels prefer moderate temperatures.
- Shading: Even partial shade can significantly reduce production.
- Cleanliness of panels: Dust and debris can block light.
The Different Types of Solar Panels and Their Yield
Monocrystalline Panels: Performance and Efficiency
Monocrystalline panels are made from a single silicon crystal. This uniform structure gives them excellent efficiency in converting sunlight into electricity. Their yield is estimated to be around 18%, making them a preferred choice for those looking to maximise energy production on a given surface area. They are particularly suited to temperate climates, where their performance remains stable. Although they may represent a slightly higher initial investment, their long-term efficiency often justifies this cost. The latest technologies, such as TOPCon, push performance even further, sometimes exceeding 22% yield.
Polycrystalline Panels: An Economical Alternative
Unlike monocrystalline panels, polycrystalline panels are made up of several assembled silicon crystals. This slightly less complex manufacturing process generally results in a more affordable purchase price. Their yield is usually between 13% and 15%. If available space for installation is less of a constraint and budget is a determining factor, polycrystalline panels represent an interesting option. They remain a viable solution for solar electricity production, even if their efficiency is slightly lower than that of monocrystalline panels.
Understanding Solar Panel Yield
Solar panel yield, often expressed as a percentage, measures its ability to convert solar energy into usable electricity. A panel with a 20% yield will thus convert 20% of the solar energy it receives into electricity, with the rest lost as heat or reflected. Several factors influence this yield: the technology of the photovoltaic cells, the orientation and inclination of the panels, as well as weather conditions such as sunshine and ambient temperature. It is therefore complex to accurately calculate the effective yield without in-depth study. For a more precise estimate, it is advisable to consult professionals who can offer you a personalised quote based on your project and your situation.
Here is a simplified comparison table of panel types:
| Panel Type | Average Yield | Indicative Cost | Main Feature |
|---|---|---|---|
| Monocrystalline | 18% | High | High efficiency |
| Polycrystalline | 13-15% | Medium | Good value for money |
It is important to note that theoretical yield is one thing, but actual production will depend on many practical factors. Regular maintenance, such as cleaning the panels, helps maintain their optimal performance over the years. A well-designed installation adapted to your environment is key to efficient and profitable solar energy production in the long term.
Administrative Procedures Before Installation
Before you can benefit from the electricity produced by your solar panels, it is essential to go through several administrative steps. These formalities, although sometimes perceived as complex, are necessary to ensure the compliance of your installation and allow you to benefit from all advantages, such as selling surplus electricity.
Prior Declaration of Works at the Town Hall
The first step generally involves informing your town hall of your project. If you are installing panels on an existing house, you must submit a prior declaration of works. This document allows the municipality to verify that your installation complies with local planning regulations, such as those defined in the Local Urban Plan (PLU). It should be noted that in certain protected areas (listed sites, near historical monuments), stricter rules apply, and specific authorisation may be required. The town hall has one month to respond. It is therefore advisable to start this process in advance. To help you with this procedure, you can consult your municipality’s PLU, available at the town hall or on their website. This declaration is a key step to getting the green light for your project.
Connection Request to Enedis
Once your town hall’s approval is obtained, you must contact Enedis, the electricity distribution network operator. If you wish to sell your surplus production or if your installation exceeds a certain power, a connection to the grid is necessary. You will need to complete a connection request file. This file generally includes the approved prior declaration of works, a site plan of your property, and a site plan of the installation. Enedis will review your request and send you a connection proposal, which includes a quote for any works to be borne by you and a timeline. It is possible to delegate this procedure to your professional installer.
Obtaining the Consuel Certificate
The final major administrative step is obtaining the electrical compliance certificate, issued by Consuel (National Committee for the Safety of Electricity Users). This independent body verifies that your installation complies with all current safety standards. A Consuel technician will visit the site after the work is completed to inspect the installation. Once compliance is validated, Consuel will issue the certificate, which is essential for Enedis to commission your installation. This certificate proves that your installation is safe and compliant with regulations. It is strongly recommended to entrust this procedure to your installer, who will know how to carry it out correctly.
It is important to note that these procedures may vary slightly depending on your municipality and the exact nature of your project. A qualified professional can guide you effectively through these different administrative steps, ensuring a compliant and smooth installation.
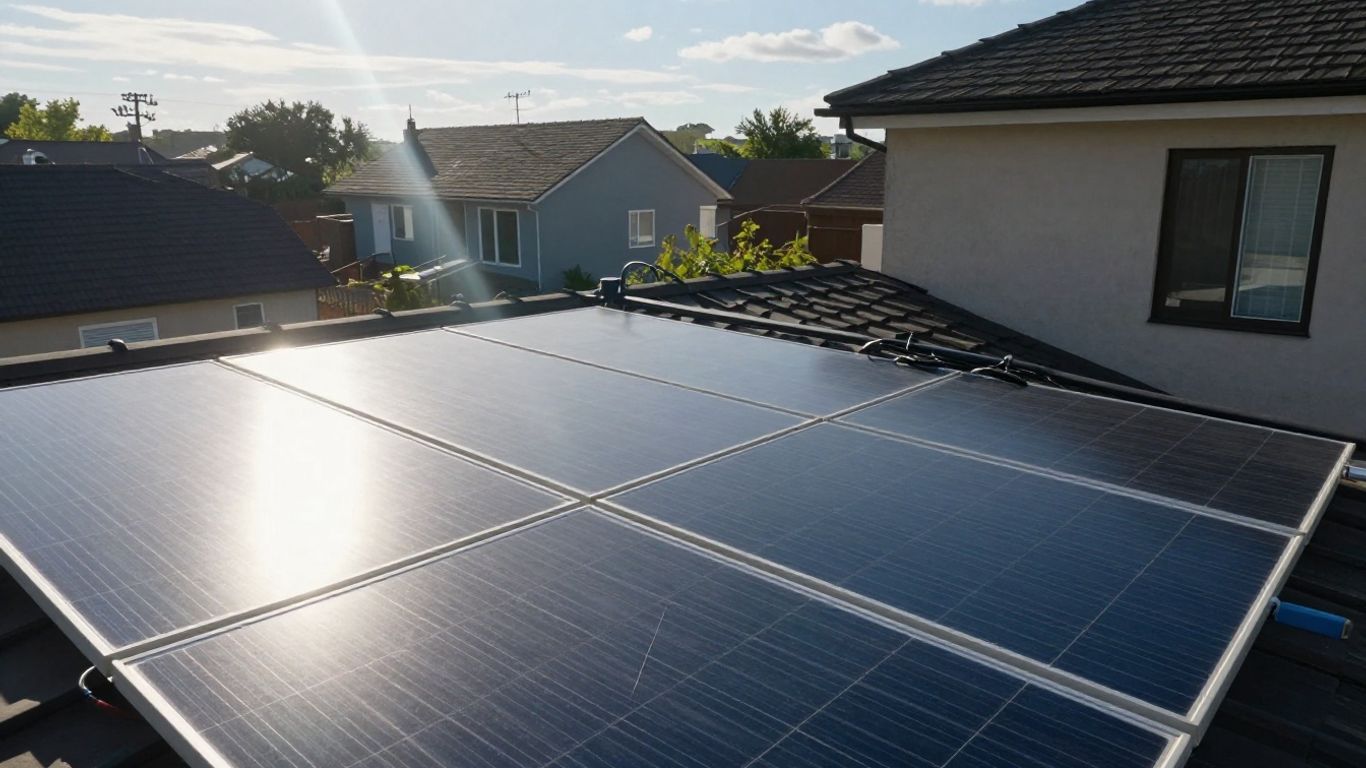
Solar Panel Installation: Key Steps
Once all administrative procedures are validated and you have obtained the necessary authorisations, the physical installation of the solar panels can begin. This process, while technical, is generally well-managed to ensure safety and performance.
Mounting the Support Structure
The first step is to securely fix the structure that will hold your panels. This frame, often made of aluminium, is designed to withstand weather and ensure the longevity of the installation. It is attached to your roof or the ground depending on the type of installation. A prior study of your roof is essential to ensure its solidity and compatibility. The choice of structure will also depend on the type of roofing (tiles, slates, metal sheeting, etc.). It is important to ensure that this structure is perfectly level and securely anchored to support the weight of the panels and withstand climatic conditions.
Installing the Photovoltaic Modules
Once the structure is in place, the solar panels are attached to it. They are generally mounted in series or in parallel, depending on the chosen configuration. Connection cables are discreetly routed along the structure. It is important to respect the recommended spacing between panels to optimise airflow and avoid shading. Orientation and inclination are determining factors for energy production, and their precise adjustment is made during this phase. For ground-mounted installations, the process is similar, but an appropriate foundation must be provided.
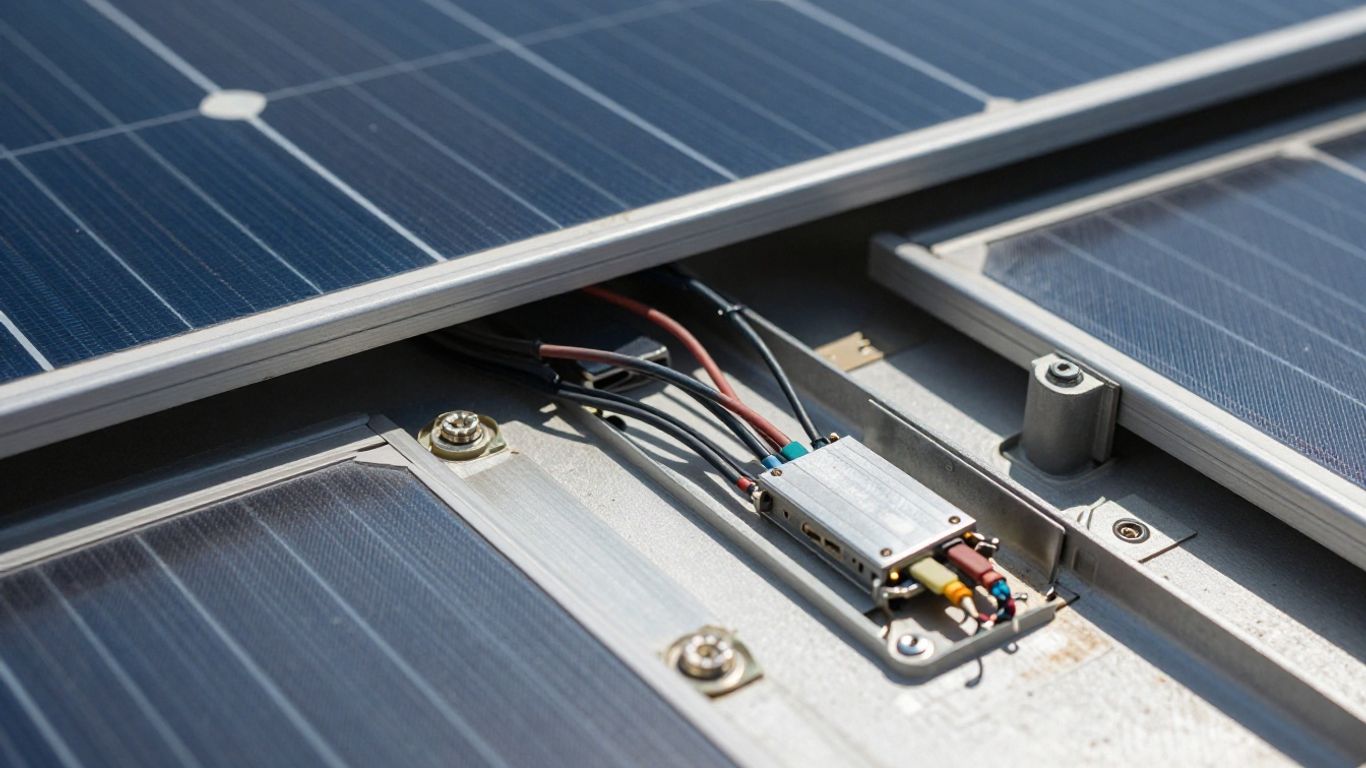
Electrical Connection by a Professional
This is the most technical step and absolutely requires the intervention of a qualified electrician. The panels produce direct current, which must be converted into alternating current to be usable by your household appliances. The inverter (or micro-inverters) performs this conversion role. It is then connected to your home’s electrical panel. This connection must be made in compliance with current safety standards to avoid any risk of fire or short circuit. The installer will also ensure that the entire installation is properly earthed. Once the connection is made, a compliance certificate (Consuel) is generally issued, attesting that the installation meets standards. It is also necessary to apply for a connection to Enedis for your installation to be connected to the public grid, if you opt for selling surplus or total sale. Assessing your electrical needs is a prerequisite for any installation [1821].
Choosing an RGE (Reconnu Garant de l’Environnement – Recognised Guarantor of the Environment) certified installer is strongly recommended. Not only does it guarantee the quality of the installation, but it is often a necessary condition to benefit from certain state financial aid.
Self-Consumption or Total Sale: Which Scheme to Choose?
Once your solar panels are installed, a question arises: what to do with the electricity you produce? Two main paths are available: self-consumption, which involves consuming your own production, and total sale, where you sell all your electricity to the grid. Mixed formulas also exist.
The Principle of Self-Consumption with or Without Surplus
Self-consumption is the idea of becoming your own energy provider. The electricity produced by your panels is directly used to power your domestic appliances. This is the most direct way to reduce your electricity bills. If your production exceeds your consumption at a given moment, you have a surplus. This surplus can be injected into the public grid. In most cases, this surplus is purchased by an approved body, such as EDF OA (Obligation d’Achat), thus allowing you to generate additional income. It is also possible not to sell this surplus, but this is less common and less profitable.
- Advantages of self-consumption:
- Significant reduction in electricity bills.
- Increased energy independence.
- Contribution to the ecological transition.
- Potential income from selling surplus.
How Total Electricity Sale Works
With total sale, you do not consume the electricity produced by your panels. All of your production is sold to the electricity grid. This scheme was more common in the past, especially for large installations, but it is now less advantageous for individuals than self-consumption, as you do not directly benefit from savings on your bill.
- How it works:
- The electricity produced is systematically injected into the grid.
- A sales contract is established with a buyer (usually EDF OA).
- You receive payment for all electricity produced, for a specified period (often 20 years).
Financial Implications of Each Scheme
The choice between self-consumption and total sale has direct consequences on your budget. Self-consumption allows for immediate savings on your electricity bill, as you consume the energy you produce. The income generated from selling the surplus is added to these savings. Total sale, on the other hand, generates a regular income based on your entire production, but you do not benefit from direct savings on your personal consumption. It is therefore important to carefully calculate the return on investment for each option.
The self-consumption rate, i.e., the proportion of your production that you consume directly, is a key indicator. The higher it is, the greater your savings on the electricity bill will be. Tools such as energy managers or smart device control can help maximise this rate.
The Role of the Battery in a Solar Installation
A battery is not a mandatory component in a solar installation, but it can transform how you consume the electricity produced by your panels. Its main role is to store the excess energy that your panels generate during optimal sunshine hours.
Storing Excess Production
When your solar panels produce more electricity than your home consumes at a given moment, this excess energy can be directed to the battery. This is a way to avoid waste. Without a battery, this surplus is generally fed back into the public grid, often without optimal compensation. The battery acts as a reservoir of clean energy, ready for later use. It thus increases your self-consumption rate, i.e., the proportion of solar electricity that you consume directly. Integrating a battery can significantly reduce your dependence on the traditional electrical grid [eebd].
Returning Energy During Off-Peak Periods
At night, or on days with low sunshine, your solar production may be insufficient to meet your needs. This is where the battery comes into play. It returns the energy it has stored, allowing you to consume your own solar electricity even when your panels are not producing. This contributes to better energy independence and can protect you in case of a public grid power outage. The stored energy can thus power your appliances during periods of low production.
Is a Battery an Essential Option?
The decision to add a battery to your solar installation depends on several factors, including your autonomy goals, your budget, and your consumption profile. For some, a simple connection to the grid is sufficient, especially if the sale of surplus is well-remunerated. For others, the energy independence and security of supply offered by a battery are paramount. It should be noted that a battery represents an additional investment, the cost of which can vary depending on its capacity. It is therefore important to carefully assess the potential return on investment. Lithium-ion solar systems with batteries are becoming increasingly efficient, and their storage capacity could increase considerably in the coming years [17fc].
Here are some points to consider:
- Increased autonomy: You are less dependent on the electrical grid.
- Safety in case of power failure: Stored energy can take over.
- Optimisation of self-consumption: You make the most of your solar production.
- Initial cost: Adding a battery increases the initial investment.
- Lifespan and maintenance: Like any equipment, the battery has a lifespan and may require maintenance.
Lifespan and Warranty of Solar Panels
The Lifespan of a Photovoltaic Panel
When considering installing solar panels, a question often comes to mind: how long will they last? This is a legitimate concern, as it is an investment. Rest assured, solar panels are designed to be robust and last a long time. Most current models have a lifespan exceeding 25 to 30 years. Some manufacturers go even further, announcing lifespans of up to 40 years for their best products. It should be noted that lifespan is different from warranty period. Even after the warranty period ends, your panels will continue to produce electricity, although their performance may decrease slightly.
Understanding Manufacturer Warranties
Manufacturers offer different warranties for their solar panels, and it is important to distinguish them:
- Product warranty: This covers manufacturing defects of the panels themselves. Its duration is generally 10 to 15 years, but can sometimes reach 25 years with some high-end manufacturers.
- Performance warranty: This is the most important warranty for you. It ensures that your panels will retain a certain percentage of their initial power after a certain number of years. The standard is often 80% of nominal power after 25 years. Some manufacturers offer longer or more performant warranties.
- Installation warranty: This covers the work carried out by the installer. It covers defects related to mounting, wiring, and the support structure. The duration varies by professional, but a ten-year warranty is often offered for building work.
It is also possible that your home insurance covers certain risks related to your solar installation, such as bad weather. Remember to check the details of your policy.
Panel Performance Over Time
The performance of a solar panel is its ability to convert sunlight into electricity. Over time, this ability naturally decreases. This is called degradation. Manufacturers commit to a maximum degradation rate through their performance warranty. For example, a warranty stating that the panel will produce at least 80% of its initial power after 25 years means that the average annual degradation rate will not exceed 0.5% to 0.8% depending on the case. This is a slow and predictable degradation.
It is important to note that the actual performance of your panels also depends on external factors such as sunshine, temperature, and regular maintenance. Occasional cleaning can help maintain optimal production.
Here is a table illustrating a typical performance warranty:
| Year | Guaranteed Power (minimum) |
|---|---|
| 1 | 97% |
| 10 | 90% |
| 25 | 80% |
Ready-to-Plug Solar Kits: A Simplified Solution
Composition and Installation of a Solar Kit
Ready-to-plug solar kits represent an accessible approach for those who wish to get started with solar energy production without undertaking complex work. These kits generally include the essential elements needed: photovoltaic panels to capture light, an inverter to convert direct current into usable alternating current for your appliances, as well as cables and the mounting structure. The aim is to simplify the installation process as much as possible. The promise is to be able to produce your own electricity with minimal effort.
The installation of a solar kit is designed to be achievable by individuals with some DIY skills. The provided instructions detail the steps for assembling the structure and fixing the panels. However, the electrical connection to your home’s panel requires particular attention. Although some kits are described as « plug and play, » meaning they can be plugged directly into an existing socket, it is often recommended, for safety and compliance reasons, to use a qualified electrician for this final step. This ensures that everything is correctly connected and secured, avoiding potential problems.
Advantages and Limitations of Plug-and-Play Kits
The main appeal of « plug-and-play » solar kits lies in their simplicity and relatively low entry cost. They allow you to test self-consumption without a significant investment, offering a first experience in green energy production. Furthermore, their often less intrusive nature makes them adaptable to various situations, including for homes where roof installation is not feasible. They can even be a solution for powering specific installations such as gardens or balconies.
However, it is important to understand their limitations. The power produced by these kits is generally more modest than that of larger installations. Furthermore, their direct connection to a socket may sometimes be subject to local regulations or power limitations imposed by the grid operator. It is therefore essential to inquire about the specifics of your electrical installation and any potential administrative procedures before purchasing. For more significant energy production and deeper integration, a professional installation remains the norm.
Adapting the Kit to Your Specific Needs
The choice of a solar kit should primarily be based on a precise assessment of your energy needs. What is your annual electricity consumption? Do you simply want to reduce your bill or aim for greater autonomy? Kits are available in different power ratings, ranging from a few hundred watts to several kilowatts. A 300W kit, for example, will be suitable for occasional use or to offset a small part of your consumption, while a 3000W kit or more can have a more significant impact on your overall bill.
The intended location for the panels must also be considered. Is it a ground mount, a balcony, or a roof installation? Some kits are specifically designed for ground mounting, offering flexibility in orientation and inclination to optimise solar capture. Others are designed for attachment to an existing structure. Also consider the possibility of future expansion: some systems allow for the addition of extra panels if your needs evolve. Finally, for sites not connected to the grid, a solar kit must be combined with a battery to store the energy produced and return it when the sun is not shining.
Want to go solar without the hassle? Our ready-to-plug solar kits are here for you! It’s a super simple way to start producing your own electricity. Imagine: lower bills and a positive impact on the planet, all without any fuss. Curious to learn more about this easy solution? Visit our website to discover how these kits can brighten your everyday life.
To Conclude: Is Solar an Accessible Option?
There you have it, we’ve journeyed together through how solar panels work, from sunlight to electricity in your home. It’s a technology that might seem complicated at first glance, but as you’ve seen, the basic principle is quite simple. Whether you opt for a DIY kit or a professional installation, the idea is to produce your own green energy. Don’t forget the administrative procedures; they are important. Weigh the pros and cons carefully, estimate your needs, and go for it if it fits your project. It’s a step towards more responsible consumption and potentially long-term savings.
Frequently Asked Questions
How does a solar panel produce electricity?
A solar panel captures sunlight. When this light hits the special cells in the panel, it makes tiny particles called electrons move. This movement creates an electric current, much like in a battery. This current is initially a direct current, like that from batteries.
Why do we need an inverter?
The electricity produced by solar panels is direct current. However, most electrical appliances in our homes run on alternating current. The inverter is a magical device that transforms this direct current into alternating current so you can use the electricity in your home.
Where does the electricity produced by solar panels go?
Once converted into alternating current, the electricity first goes to your electrical panel. From there, it can either directly power your appliances (TV, fridge, etc.), be stored in a battery for later, or be sent to the public electricity grid if you produce too much.
Is the orientation of solar panels important?
Yes, it’s very important! To capture the maximum amount of sunlight throughout the day, it’s ideal to orient the panels towards the south. If this isn’t possible, an east or west orientation can also work, but you will produce slightly less electricity.
What is the yield of a solar panel?
Yield is the panel’s ability to convert sunlight into electricity. A panel with a 20% yield converts 20% of the solar energy it receives into electricity. The higher the yield, the better, as you produce more electricity with the same panel area.
How long does a solar panel last?
Solar panels are designed to last a long time, often more than 25 years. Most manufacturers guarantee that they will still function well after this period, even if their electricity production decreases slightly over time.
Is it mandatory to install a battery with solar panels?
No, a battery is not mandatory. It allows you to store the excess electricity you produce to use it when there is no sun, for example in the evening. If you don’t have a battery, the surplus electricity is sent to the grid.
What is a ready-to-plug solar kit?
A ready-to-plug solar kit is a set of solar panels and the necessary accessories, designed for you to install yourself more easily. It’s a practical solution for producing your own electricity, but you still need to be careful with the electrical connection.